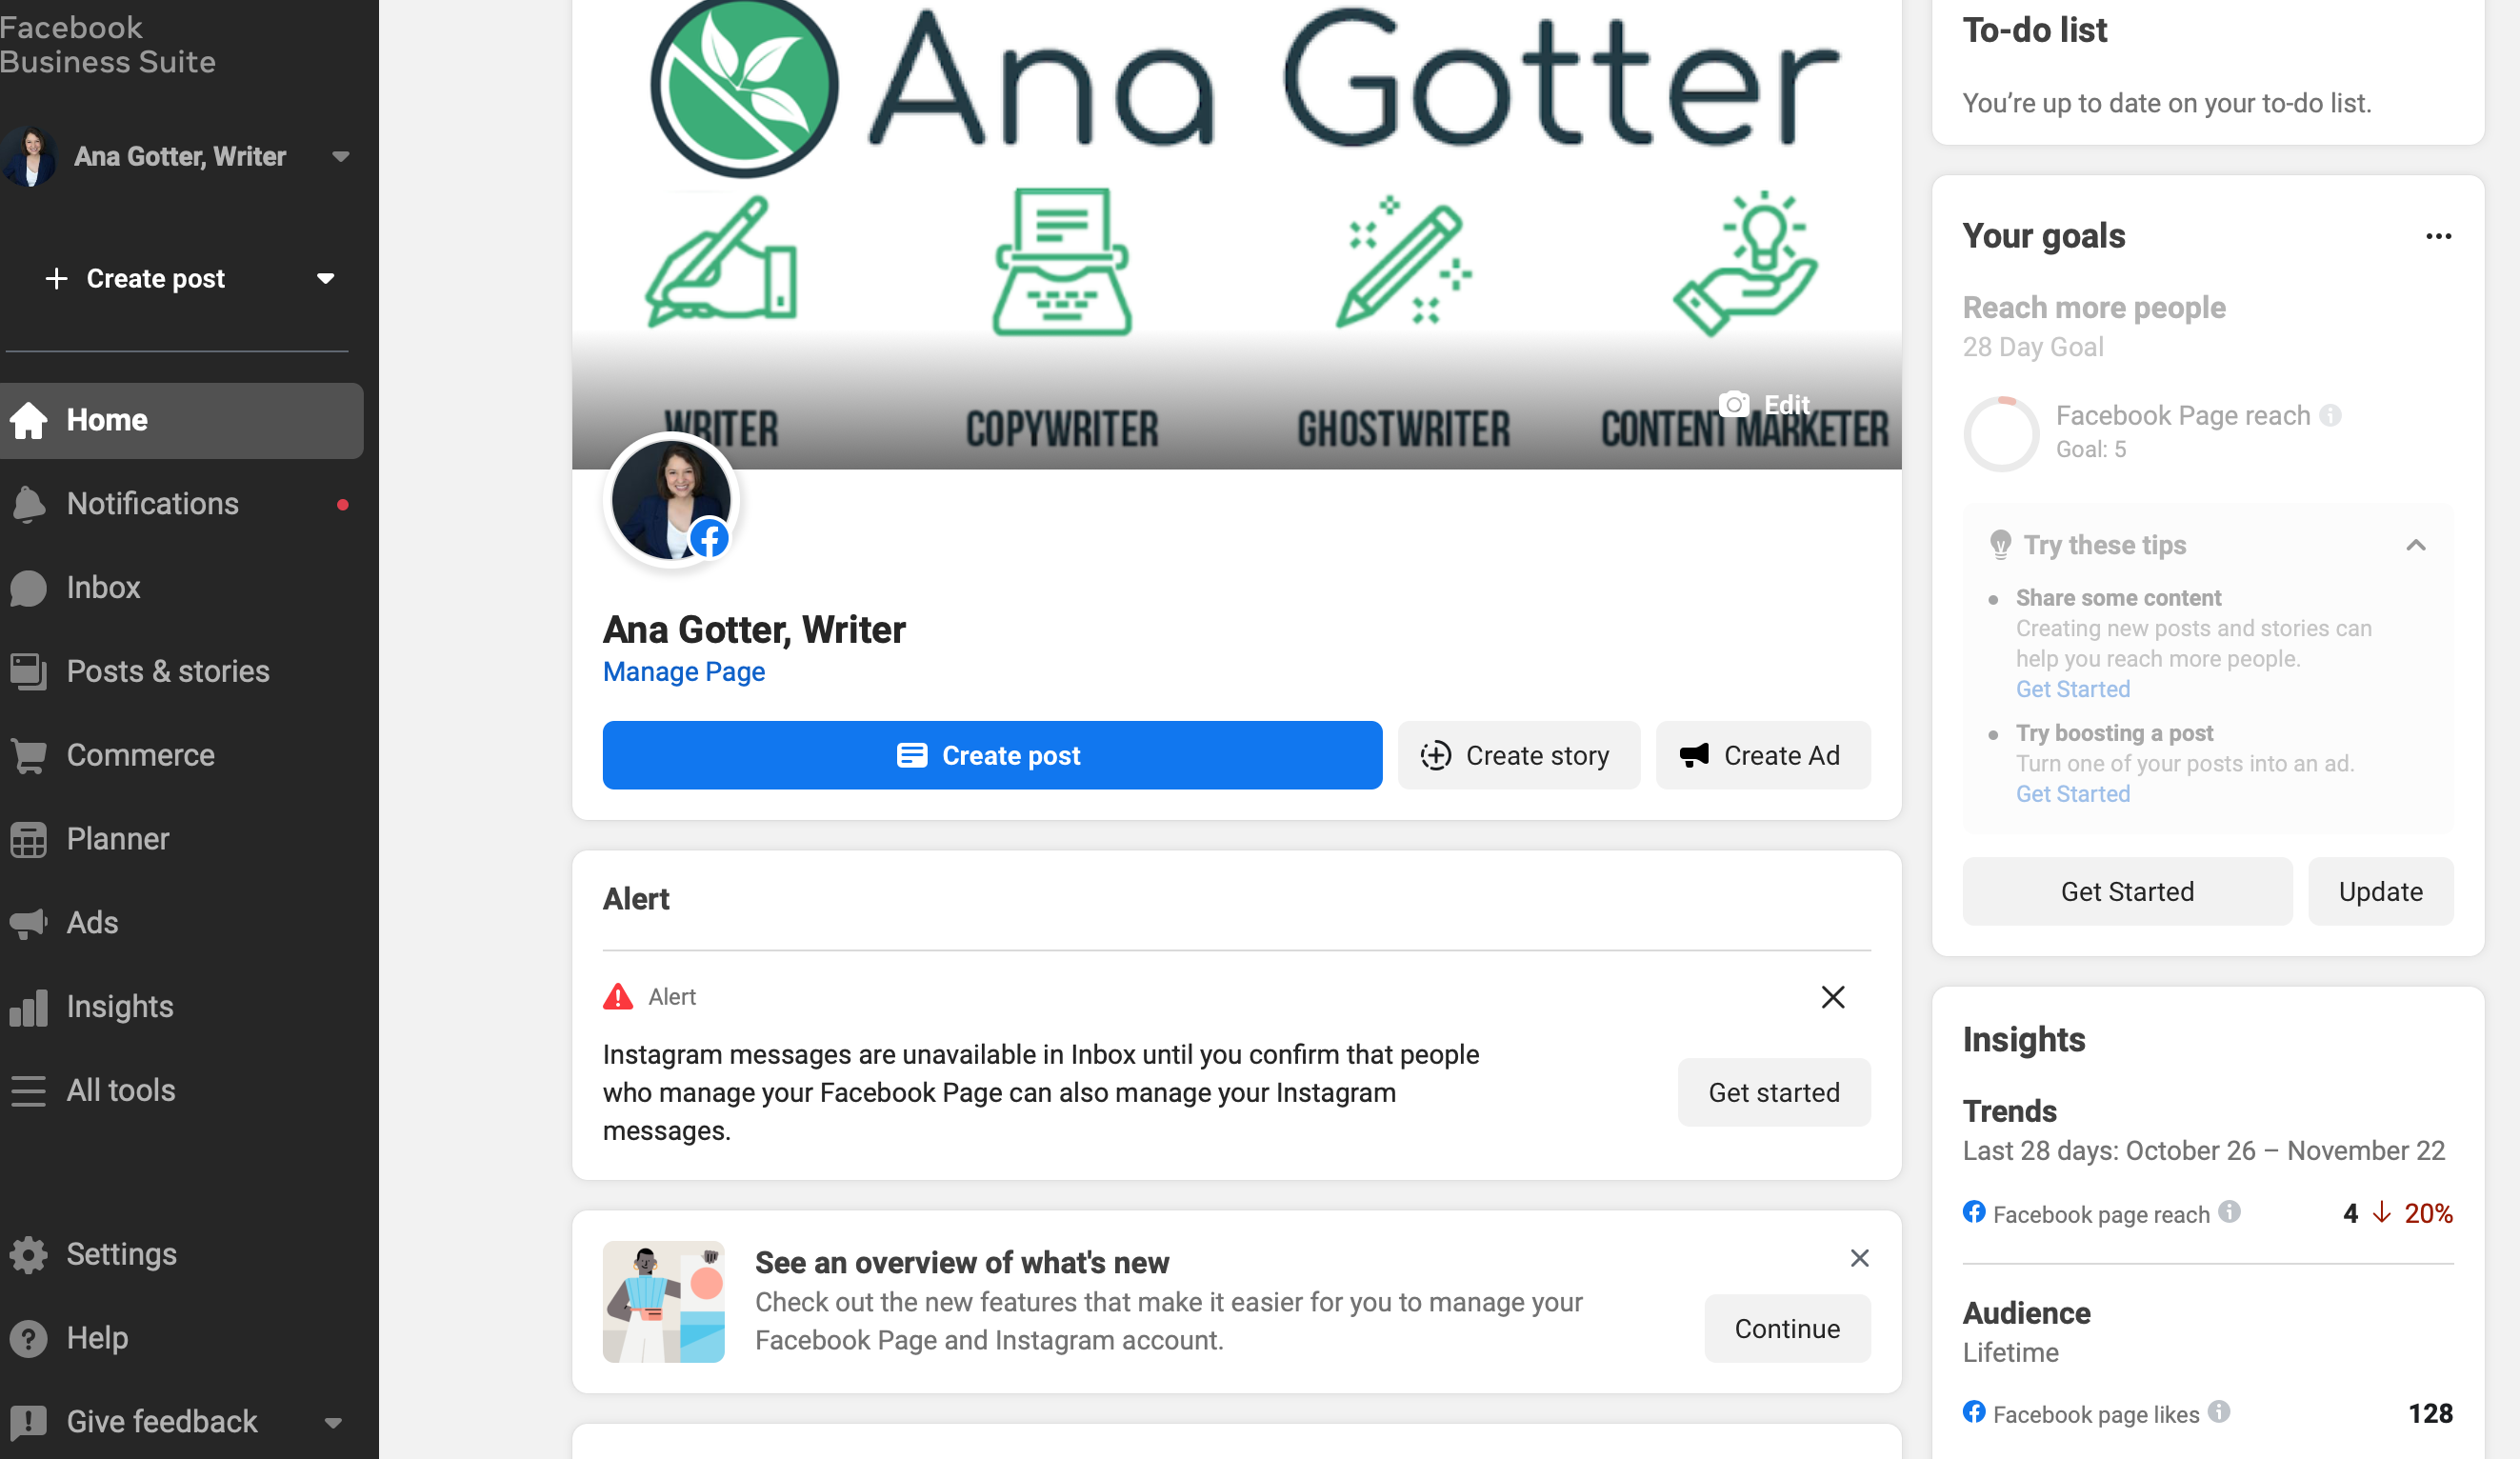
Facebook Page management can be quite time consuming. You need to create new content, generate engagement, and keep up with private messages, all at the same time. Facebook Business Suite is Meta’s answer to these needs.
Facebook Business Suite is an all-in-one solution to Page management, giving Facebook marketers a single centralized location to streamline the process of managing a brand’s presence on the platform.
The tool’s interface does take a little while to get used to, however. In this post, we’re going to walk you through the Facebook Business Suite and show you how to get the most out of it.
What is Facebook Business Suite?
The Facebook Business Suite is a free Facebook Page management tool that allows admins (and certain users with other roles) to handle Facebook Pages, Instagram accounts, and Messenger interactions from a single dashboard. Facebook Business Suite replaced the Facebook Page Manager apps.
You can use Business Suite either on desktop or through the mobile app (you can download it for iOS here and Android here).
Here’s what you can do in Facebook Business Suite:
- View notifications
- Respond to comments and messages
- Create or schedule posts, Stories, and ads
- Receive insights, tips, and “goals” that can help you optimize your performance
Facebook Business Suite vs. Facebook Business Manager
The Facebook Business Suite and Facebook Business Manager are two separate tools.
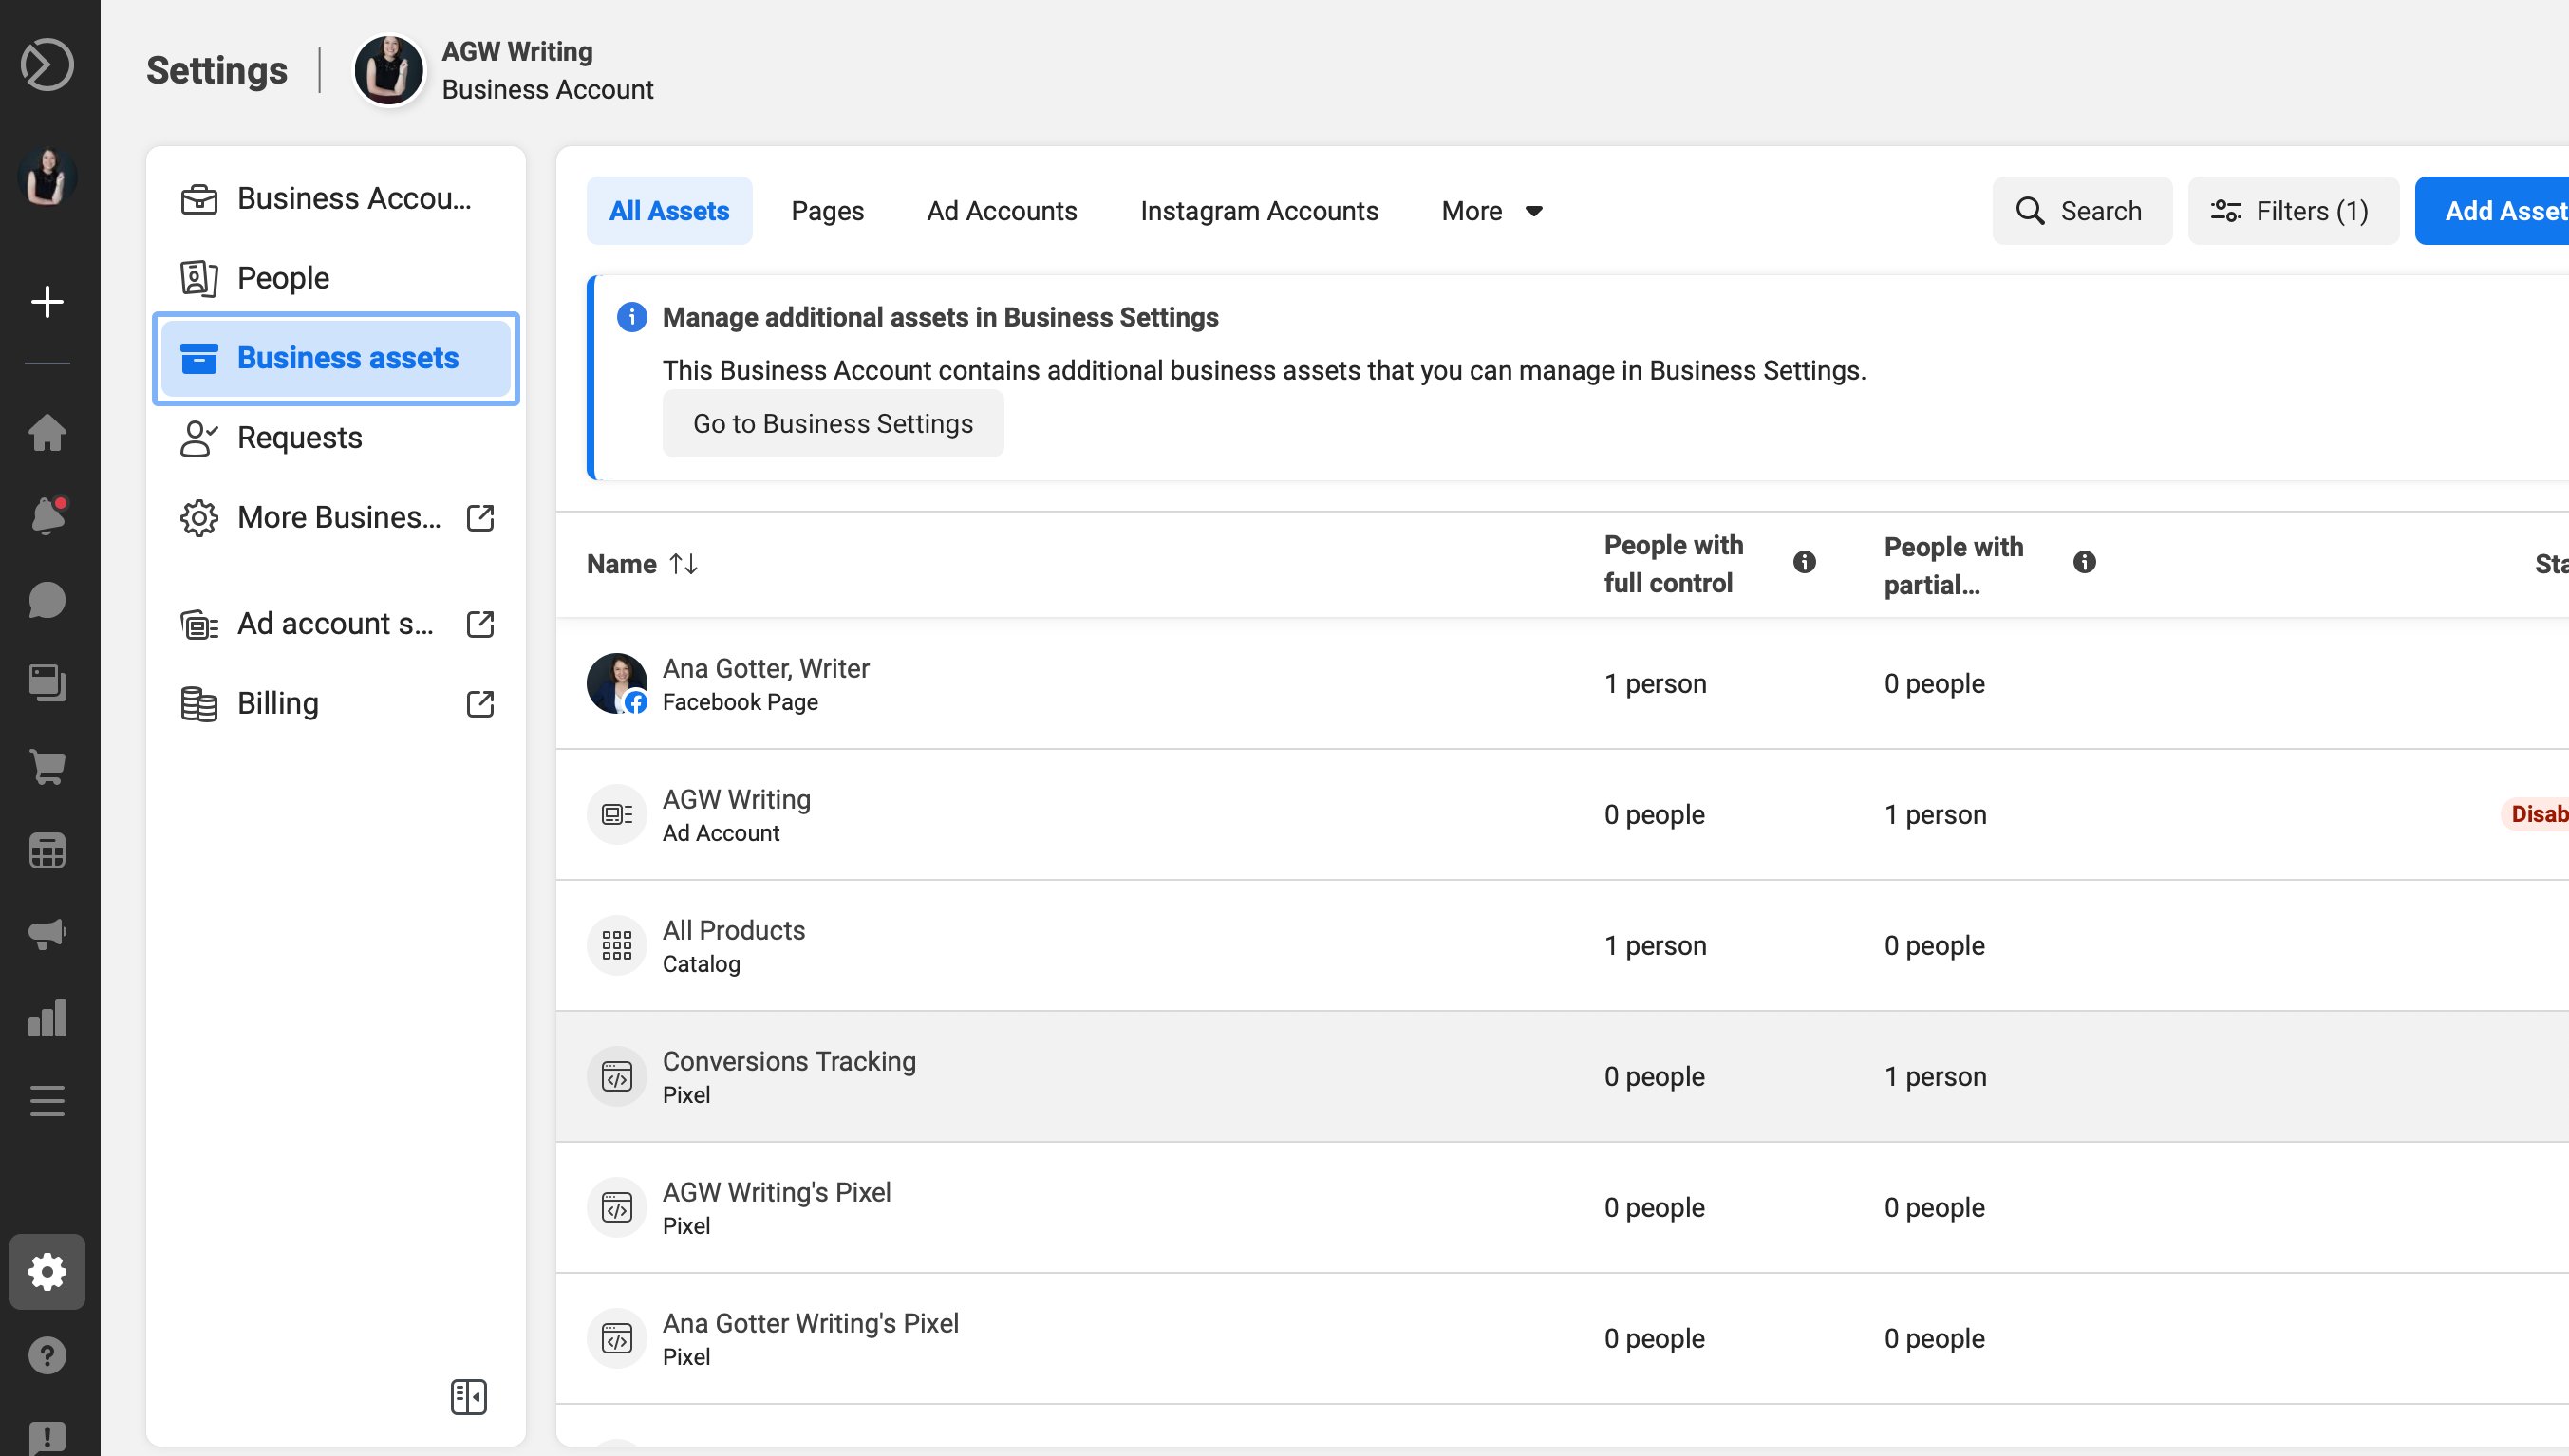
Business Manager has been around for several years and is essentially the predecessor to Business Suite. It allows you to manage assets, like Pages, ad accounts, product catalogs (but only on a basic level), and user roles.
While marketers can currently choose between the two tools, it seems that Business Suite will ultimately replace Facebook’s Business Manager. In Business Suite, you can do everything you could previously do in Business Manager, including managing business assets under “Settings.”
If you absolutely detest the new Facebook Business Suite (which is technically actually “Meta Business Suite” now), there are instructions available for how to switch back to Business Manager.
That being said, we strongly recommend adapting to the new Business Suite, as we don’t know how long the Business Manager will continue to be supported and the Business Suite offers much more powerful features.
Facebook Business Suite vs. Facebook Creator Studio
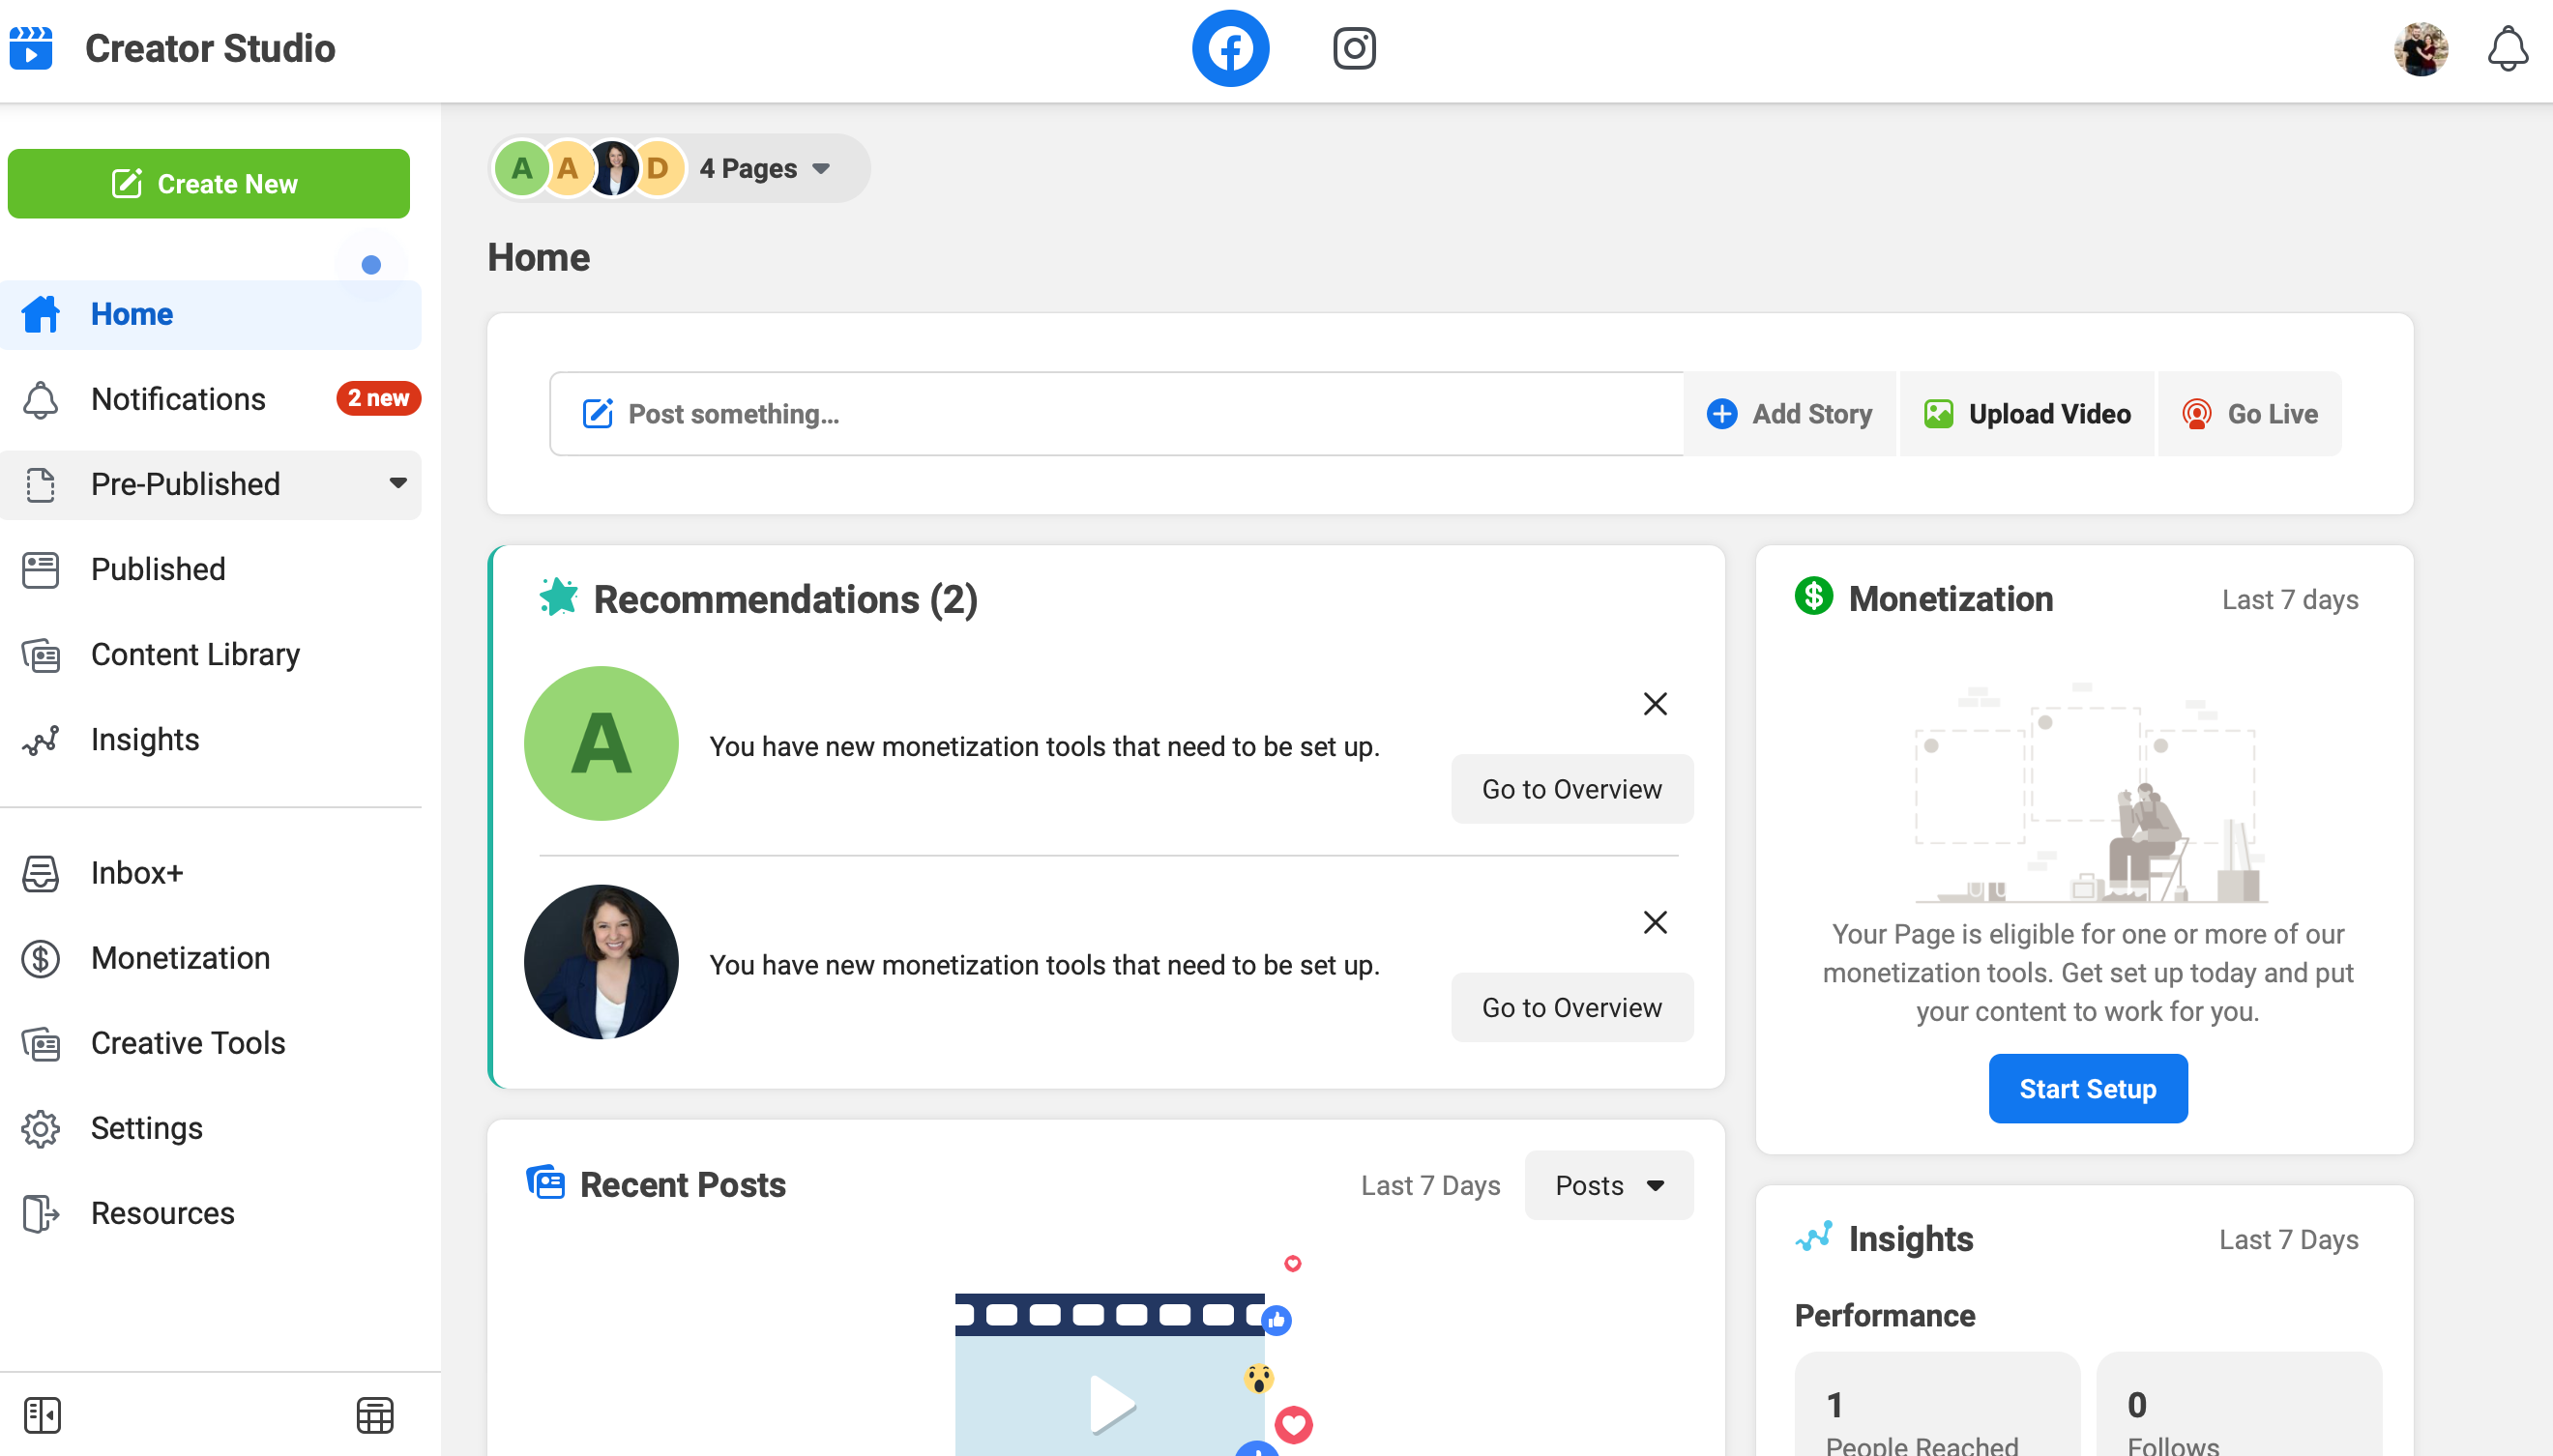
The Facebook Creator Studio and Facebook Business Suite are often confused because they have multiple overlapping features, specifically around content creation and scheduling.
That being said, they are still two separate tools, and both are valuable.
Facebook’s Business Suite allows you to create and schedule posts, ads, and Stories across multiple platforms.
Facebook’s Creator Studio has a few more tricks up its sleeve. It features additional post setup options, monetization features, post testing, and a royalty-free sound collection.
In general, Facebook Business Suite seems to be more suited for brands with active ad accounts, while Creator Studio will work best for, well, creators.
If you want to go beyond simple post creation and scheduling, you can use the Creator Studio alongside Business Suite.
Who should use Facebook Business Suite?
Anyone who manages a business on Facebook (including Pages or Instagram accounts) should at least strongly consider using the Business Suite. If you have multiple accounts to manage, you definitely should.
Facebook Business Suite costs nothing to use, but it offers a number of distinct advantages and features, and the fact that they’re all condensed and streamlined is invaluable. It also facilitates teamwork, making the process easier whether you’re a single person tackling it all or part of a larger team.
Business Suite features and how to use them
Creating and scheduling posts
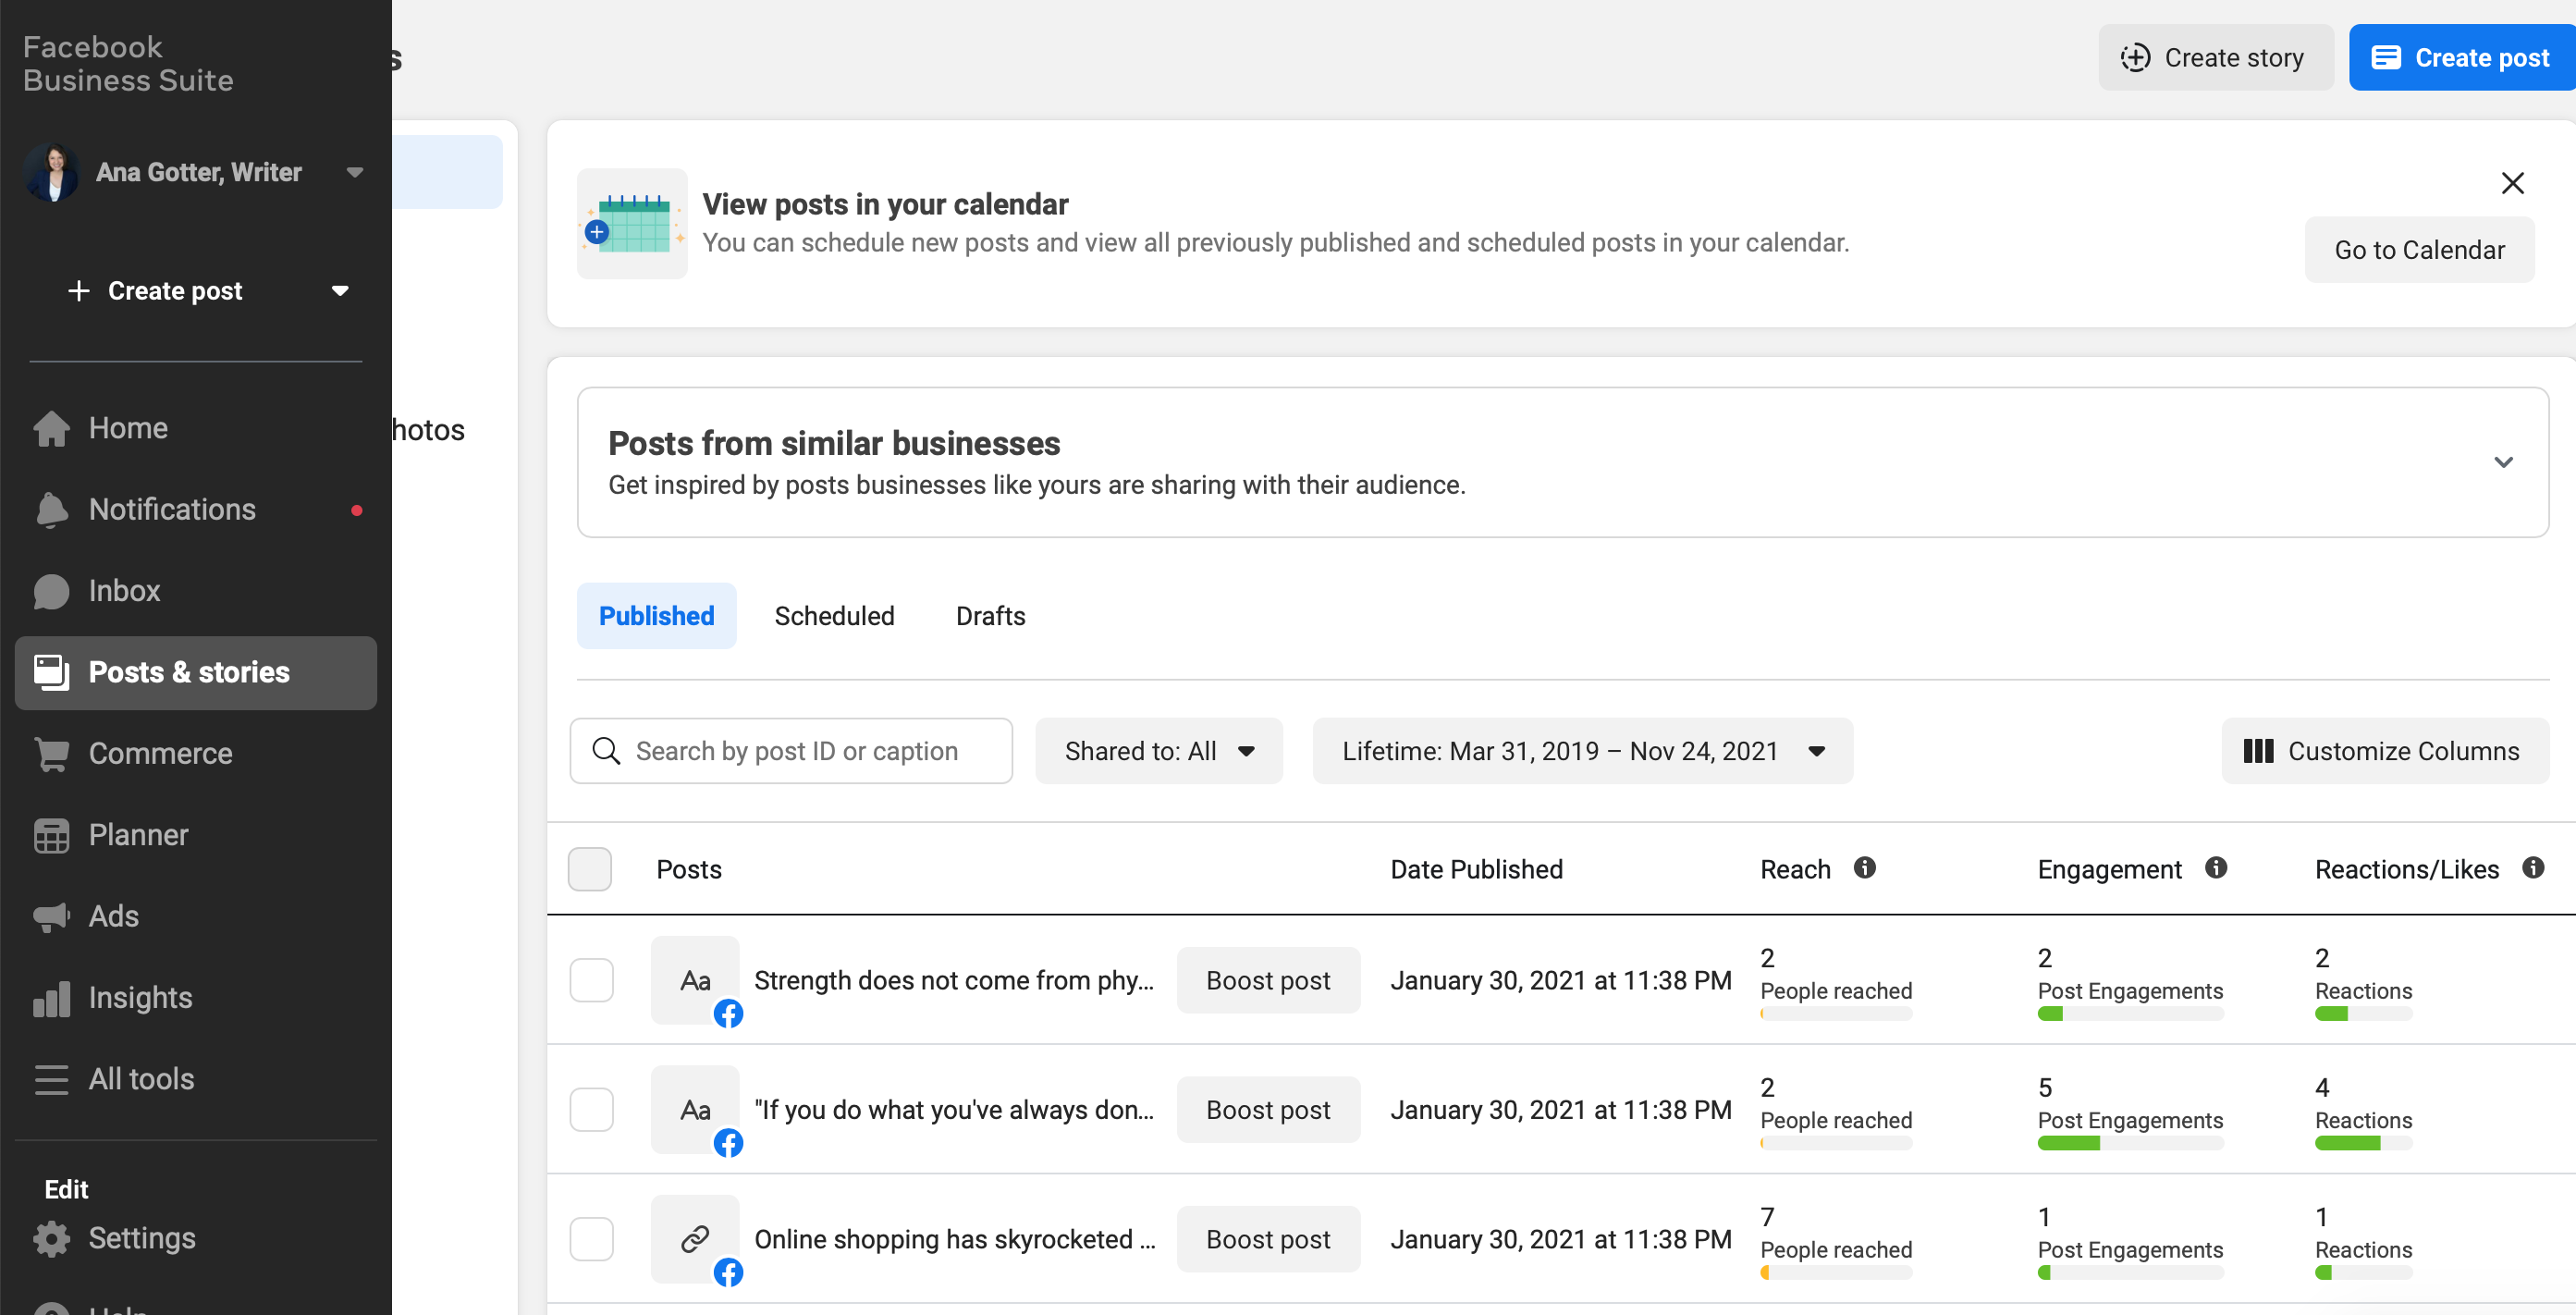
Creating and scheduling posts and Stories is one of the most common uses of the Business Suite. To do this, go to Posts & stories in the menu on the left side of the dashboard.
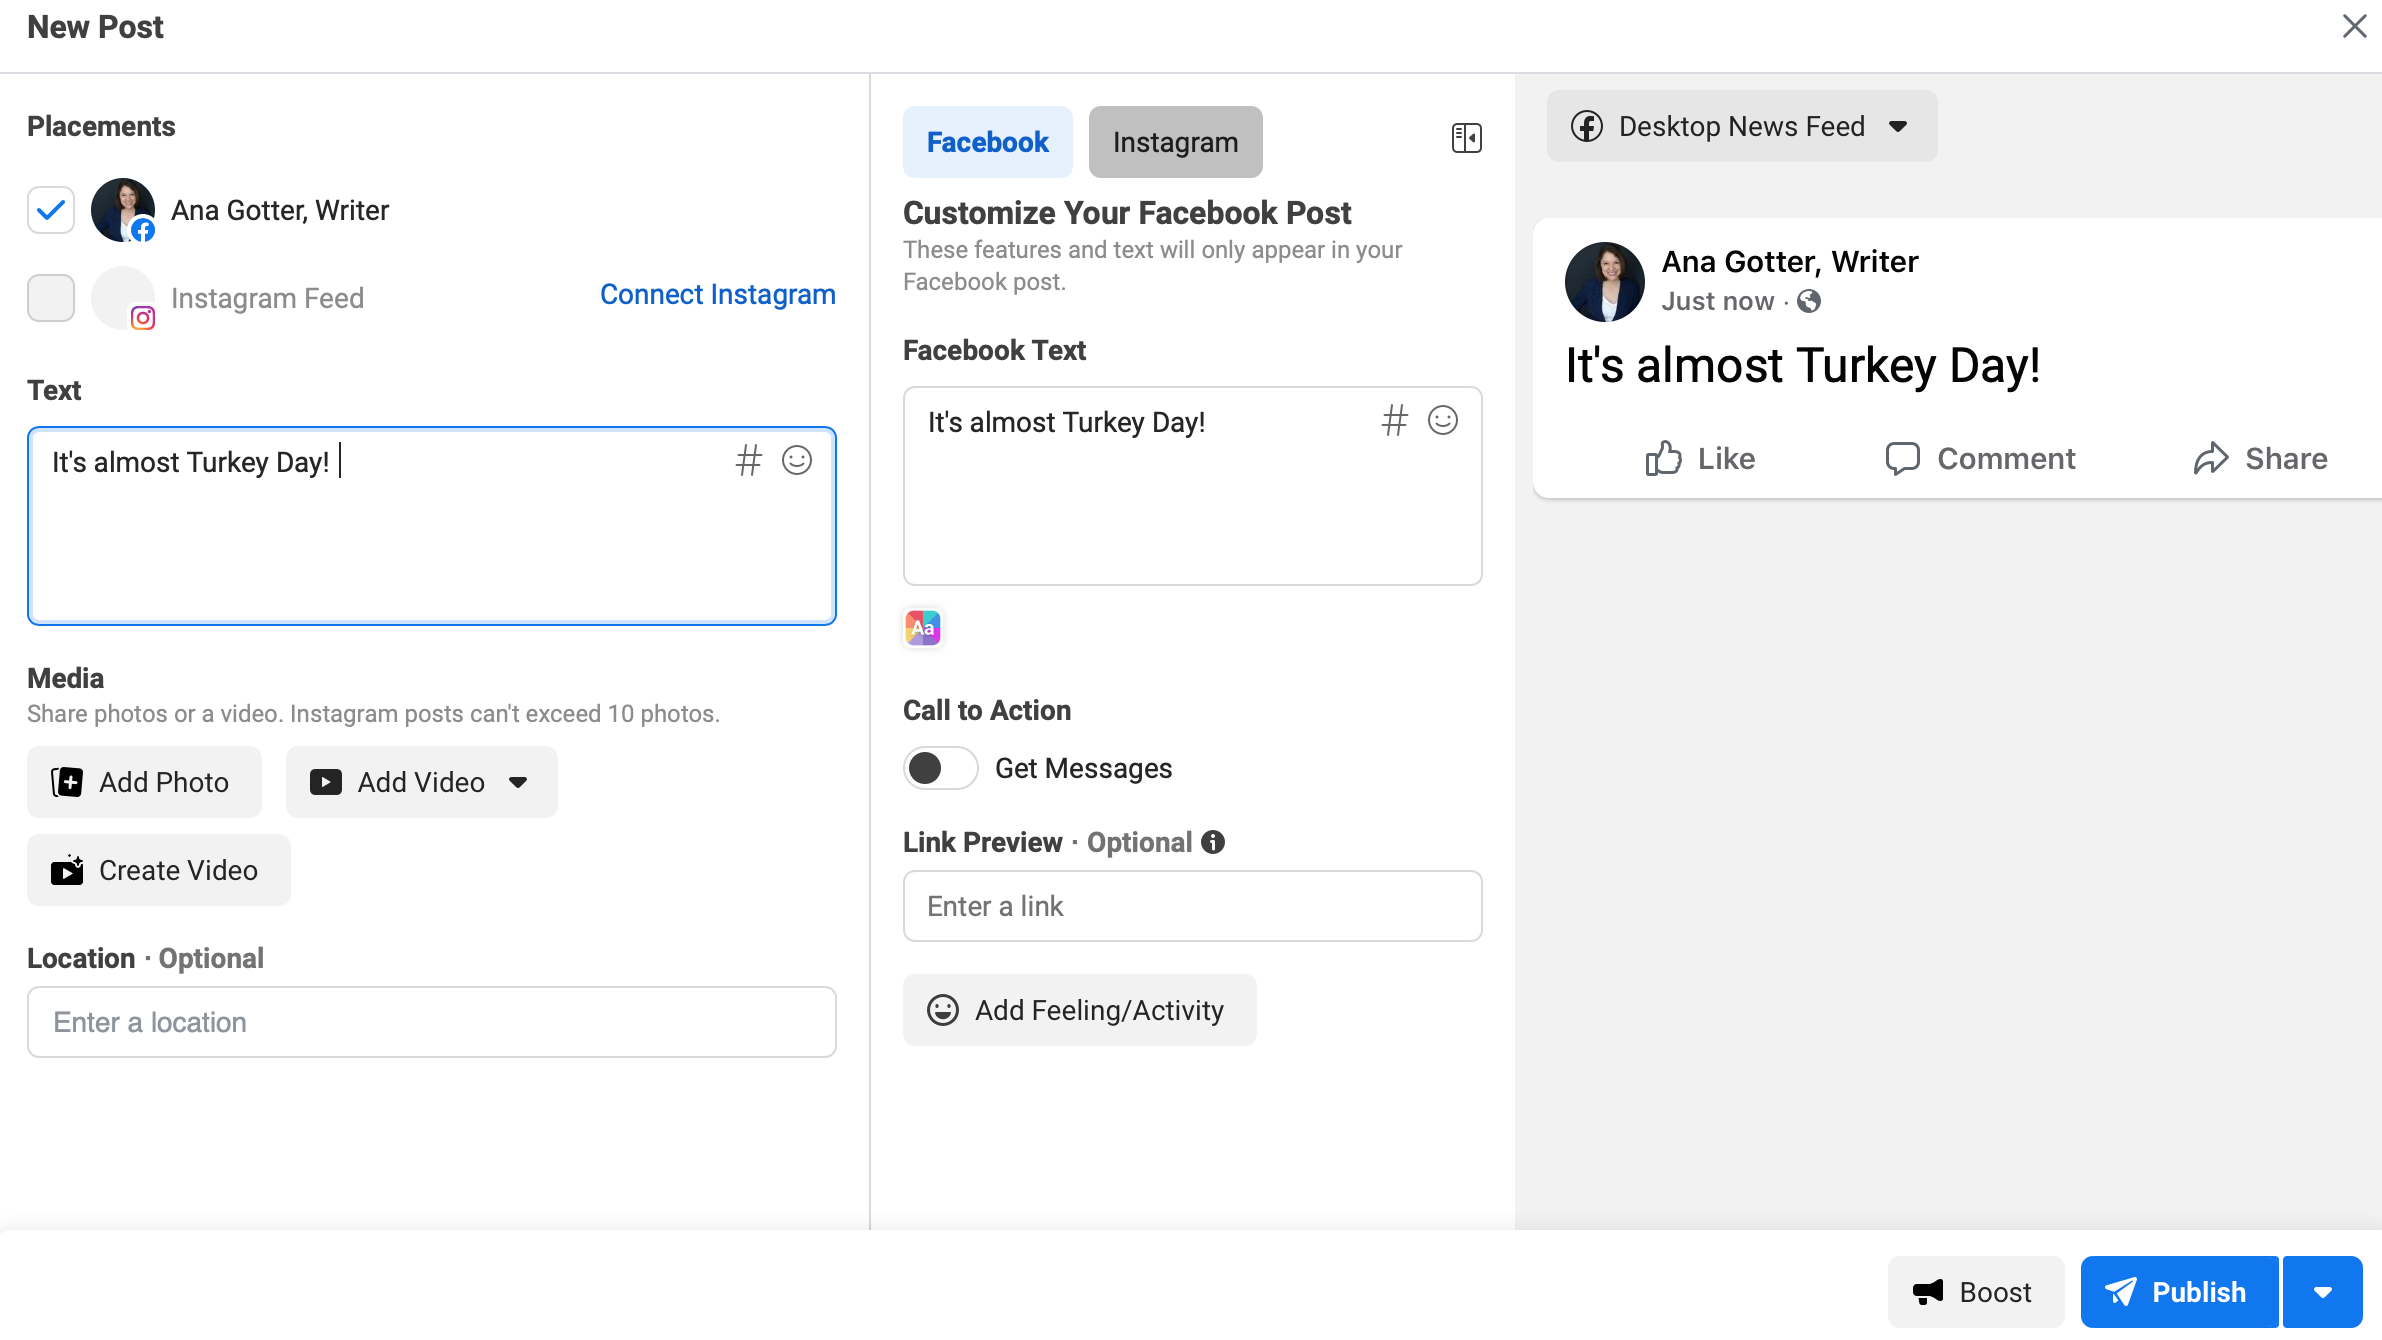
There, you will find an intuitive post creator, complete with a preview.
In the post composer, you can type out your copy, add a photo or video, and set up a location for your post. You can then add a link, and even include a call to action. Finally, you can select the account you’d like the post to be published to. Then, you can publish it immediately or schedule it for later.
Accessing Insights
Facebook Business Suite features a robust set of Insights tools that you can use to see how your content is performing.
Here’s how to access your Insights.
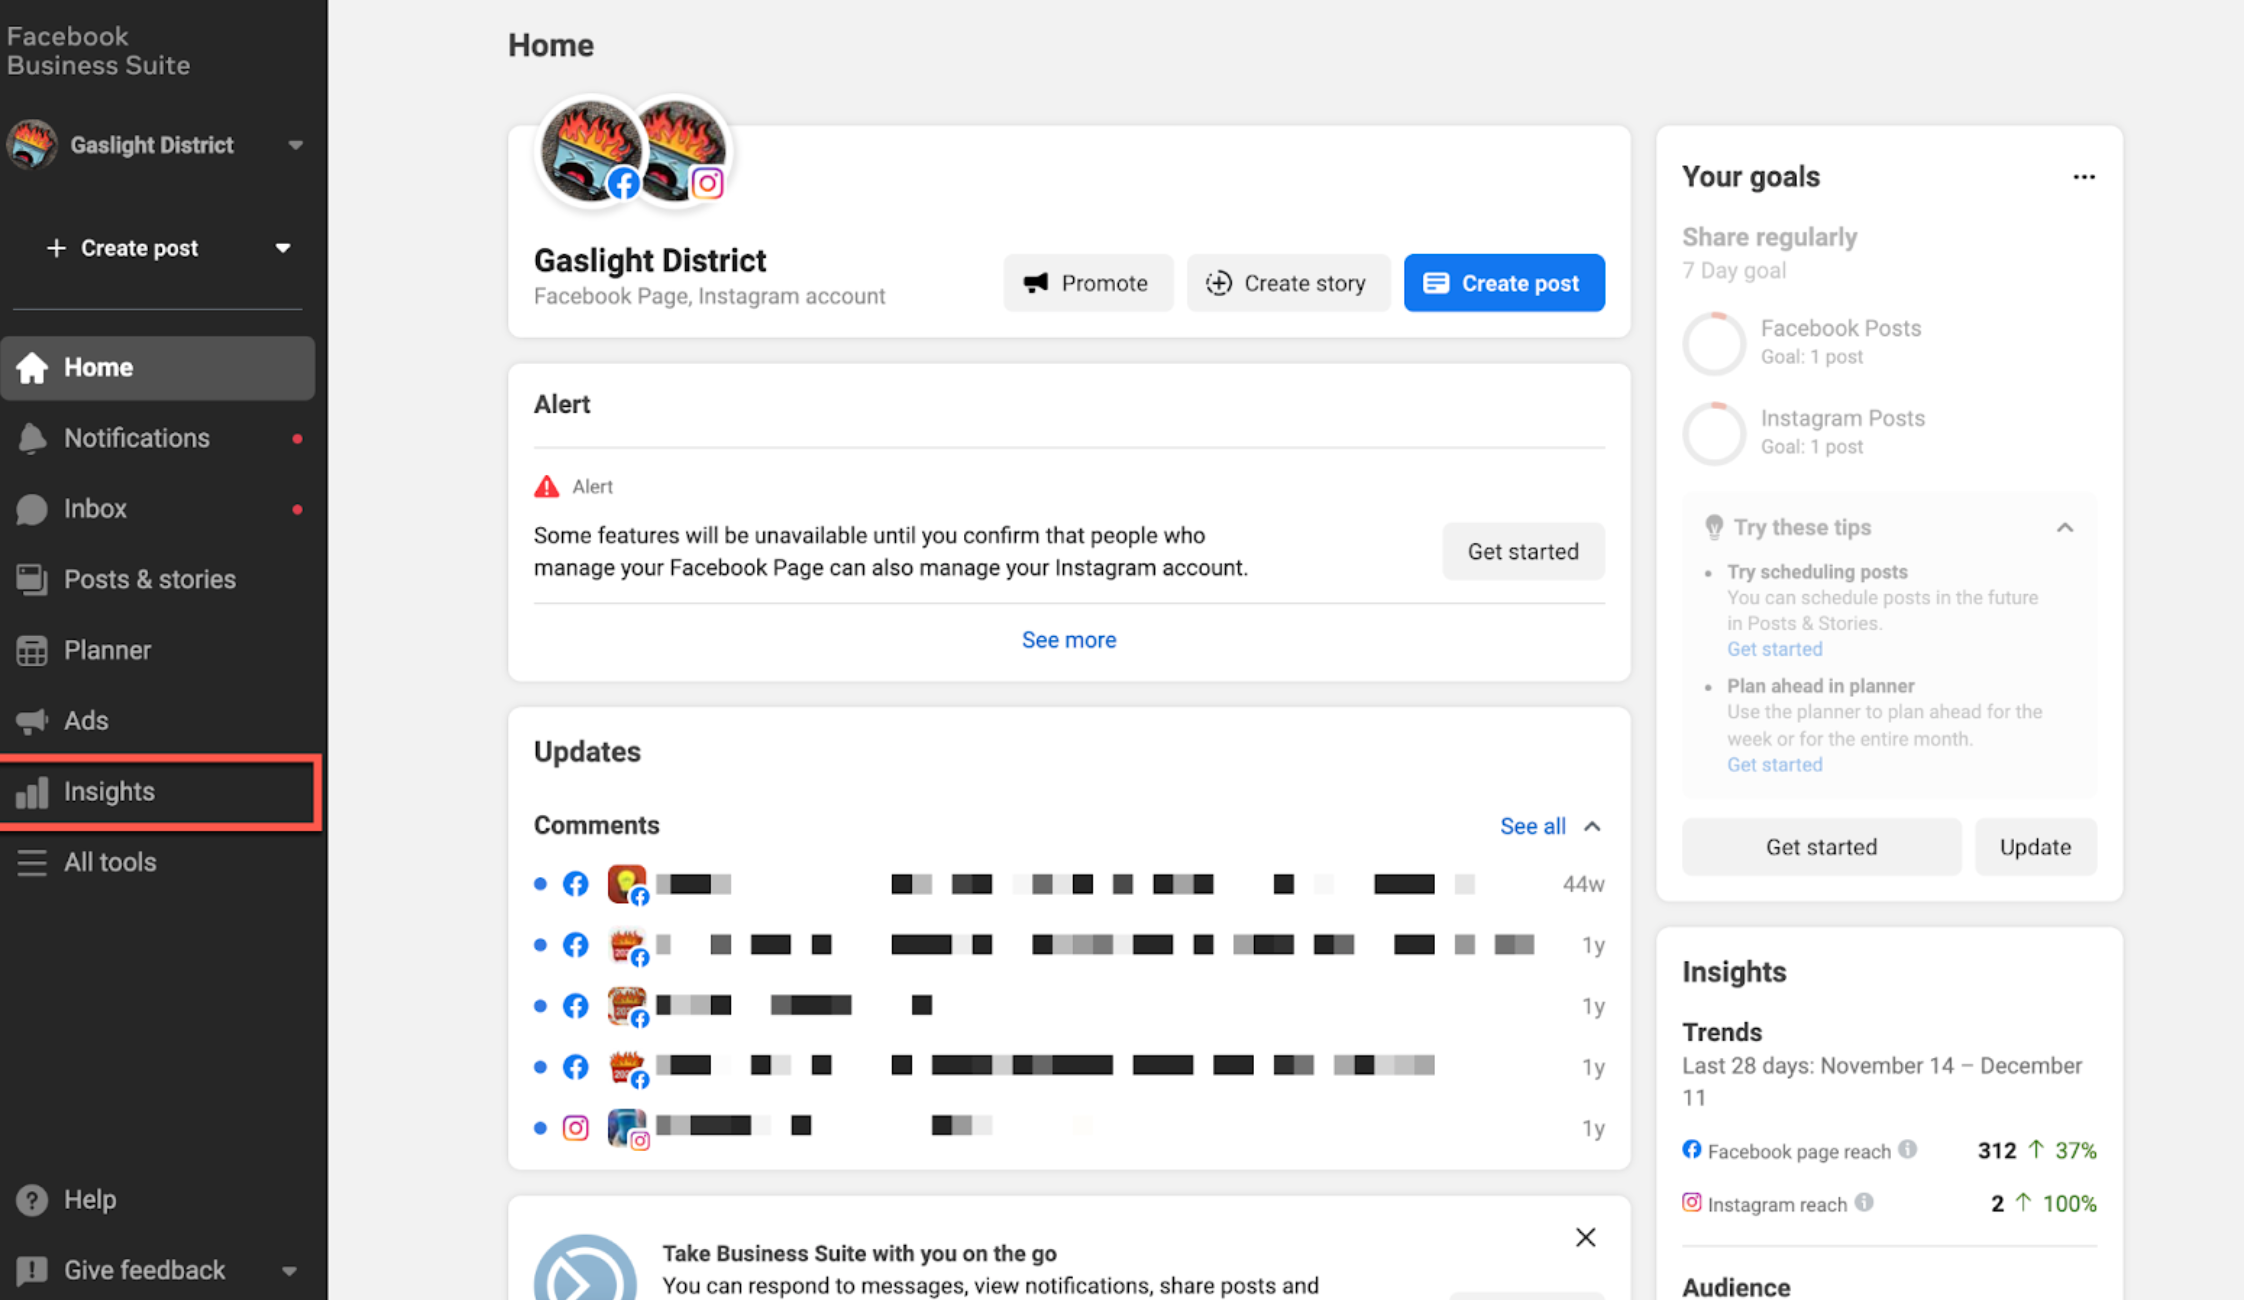
From your left-hand navigation menu, click Insights.
You’ll be able to view an overview of your business’s performance. This includes a summary of your reach, audience stats, recent post performance, and Instagram insights (if your Instagram account is connected).
If you click on Results, you’ll get an overview of your reach for connected Facebook Pages and your Instagram profiles.

When you click on Content, you’ll see a list of recent posts with performance data. Facebook will show you your post reach, likes and reactions, comments, shares, results, cost per result (if sponsored), and link clicks.
 Want to know more about your Page’s audience? Click on Audience to get a breakdown of your current audience demographics, as well as a snapshot of your potential audience.
Adding new users and roles
Adding team members to your Page can be an incredibly helpful way to get extra support with your content creation workflows.
If you want to add more roles or new users to your Facebook Page, navigate to All Tools in your left-hand navigation menu. Then, click Page Settings.
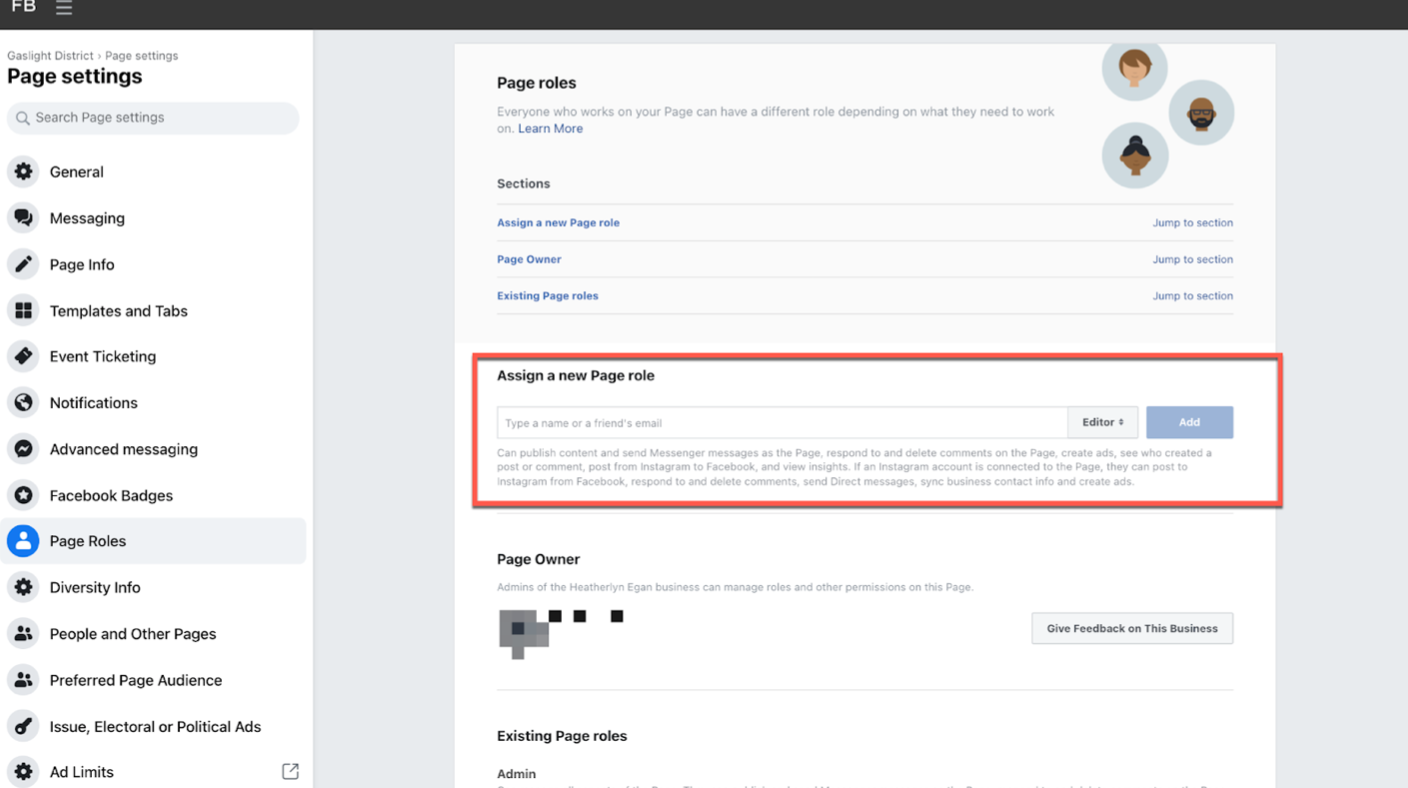
From there, click Page Roles.

Now, you can see who is currently assigned to a role on your Page. If you want to add someone new, choose their role from the drop-down menu in the center of the page (Admin, Editor, Moderator, Advertiser, Analyst, or a custom role).
Admins have the most access, so it’s not recommended to make too many users admins of the Page; instead, you can grant users different access with roles like Advertiser (who can run ads for you) and Analysts (who can access your insights). Editors and Moderators can access most of the Page without being able to remove you as an Admin or delete the Page.
Type in your team member’s name. Then, click Add.
You’re all set!
Creating Stories
Facebook and Instagram Stories are amongst the most engaging formats you can post. Let’s take a look at how to create Stories in Facebook Business Suite.
From your dashboard, click Create Story.
 Click Add Media to upload an image or video to your Story.
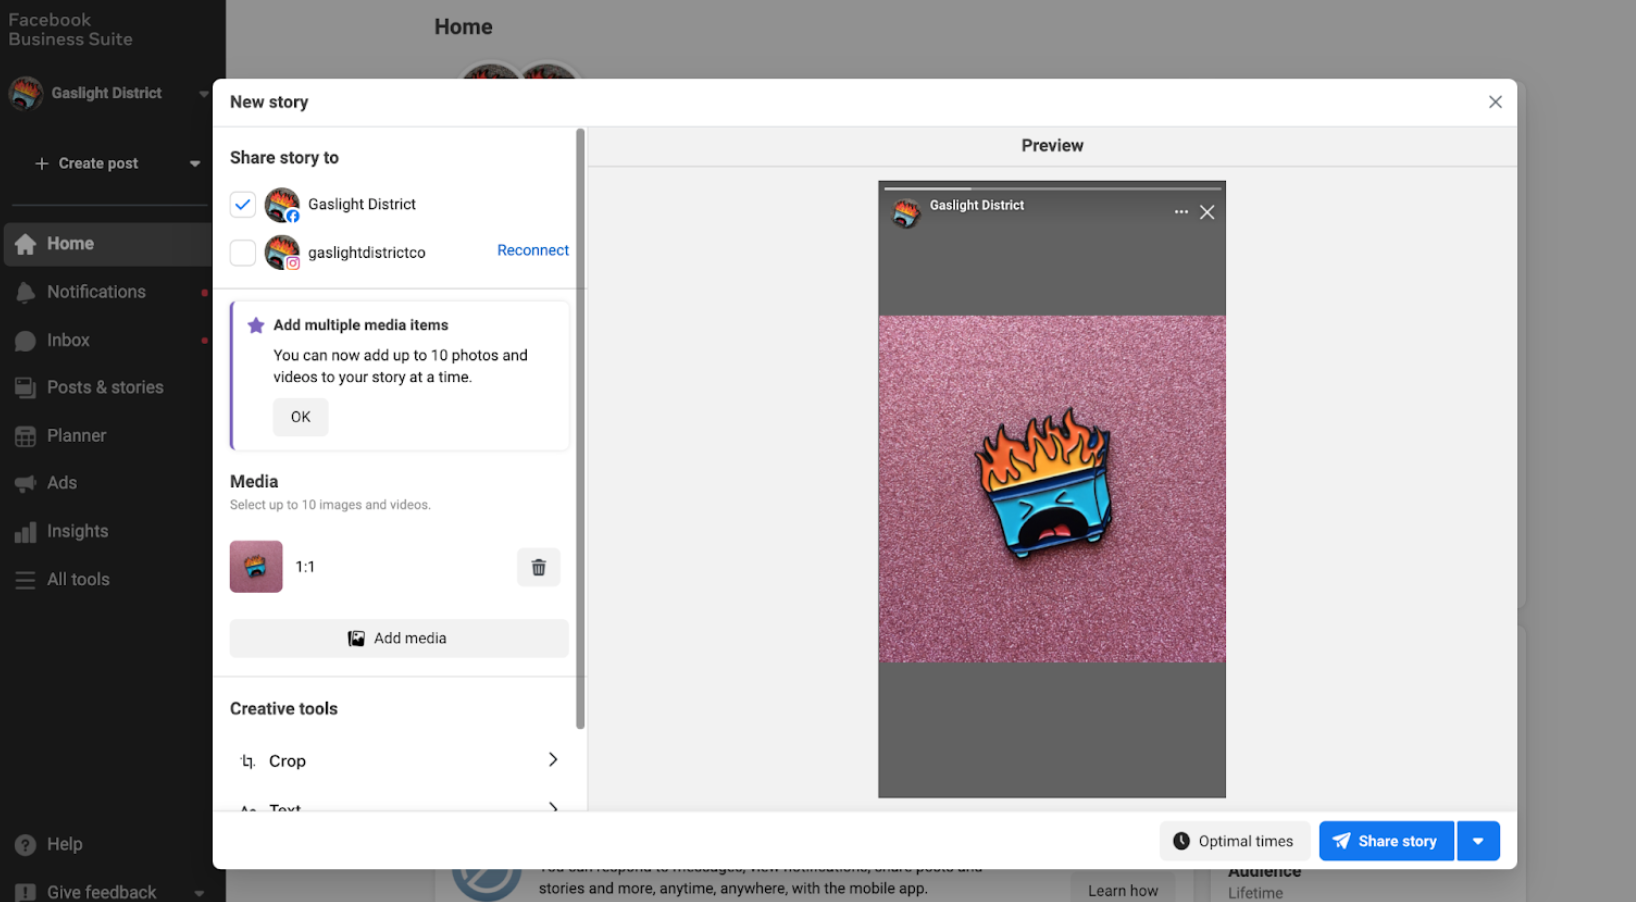
 You’ll see a preview of your Story, and you can choose if you want to post it to Facebook, Instagram, or both.
If you want to add text or stickers, or even crop your Story image, now is the time. You can also add text to your Story to add context. You can see all of these in the example below.
Decorate your Story however you want, then click Share Story. Alternatively, you can schedule your Story to post on a certain date and time. This gives you the flexibility to create content long in advance so you’re not worried about creating and uploading it last minute.
Take note of the Optimal Times button next to the blue Share Story button. When you click, this will share some of the best times to post the Story based on analytics to help you get the most reach possible. This is always worth taking a look at to get a good idea of when your Stories could make the biggest impact.
How to manage your content calendar
Facebook Business Suite allows you to view your social media content calendar, where you can see what you had scheduled and (if needed) adjust or reschedule the posts accordingly. The calendar view includes both Facebook and Instagram posts and Stories.
To view and manage your content calendar, select Planner from the navigational menu.
How to connect third-party tools with Facebook
Facebook allows Business Suite users to connect a number of powerful third-party tools that make managing your business easier.
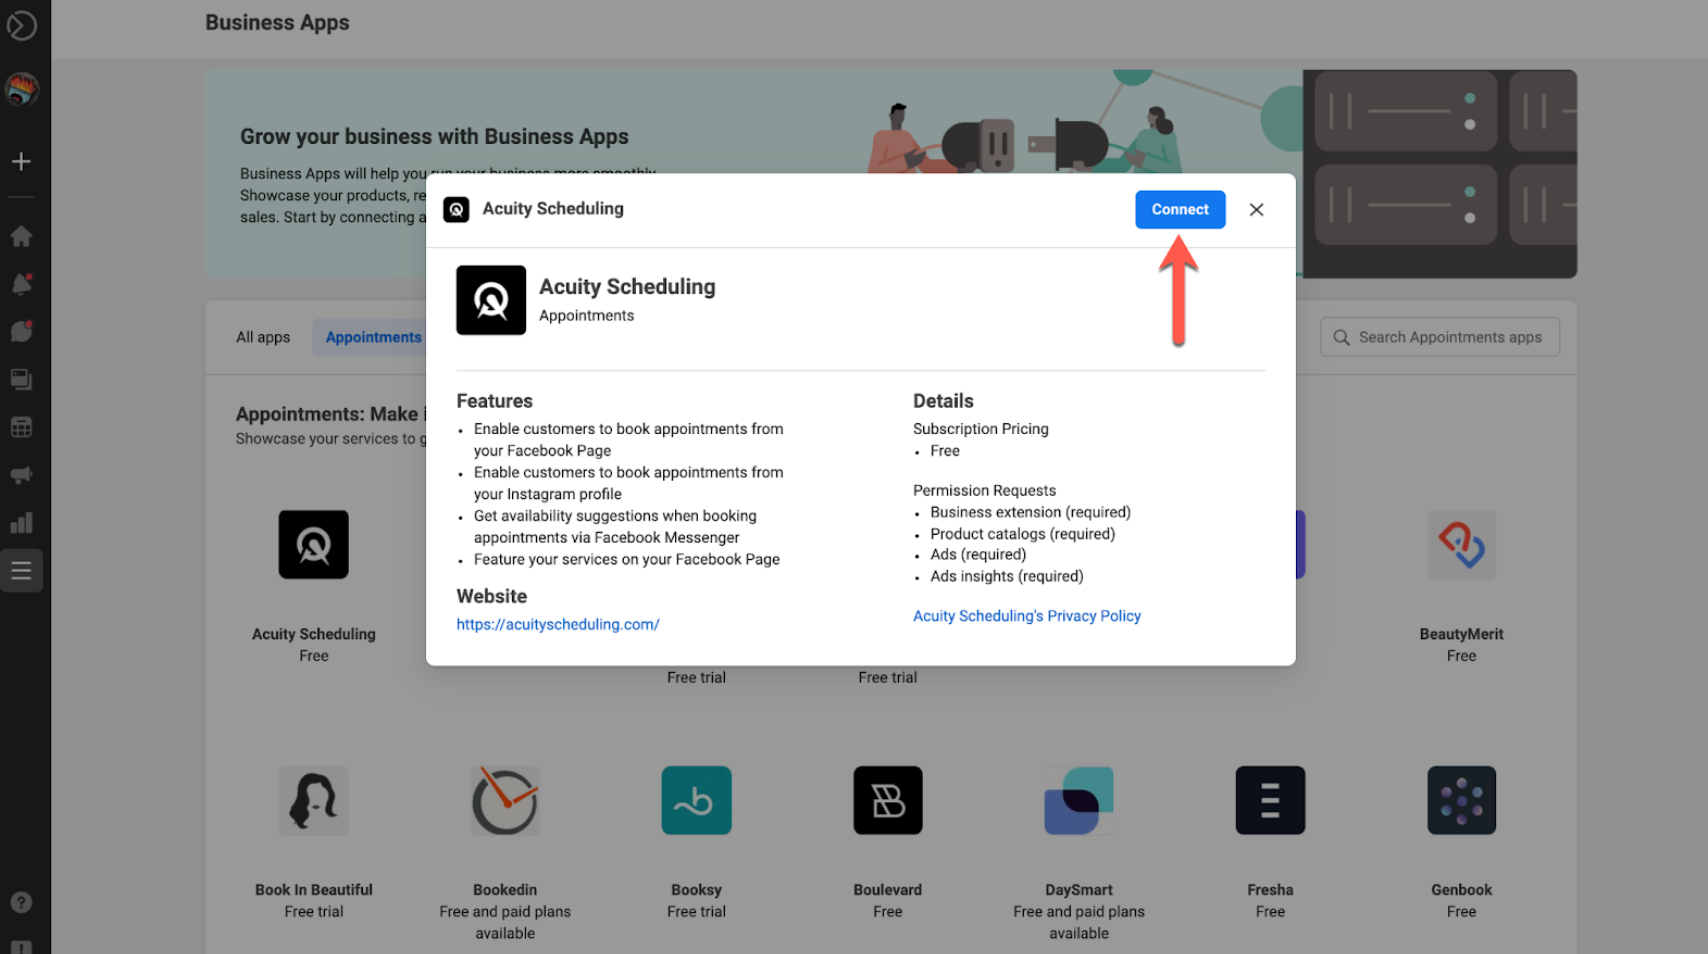
You can access Business Apps from the All Tools menu, located in the left-hand navigation bar.
There is an enormous number of apps that you can integrate with Facebook, including social media management tools (like Hootsuite), appointment-booking tools, development tools, eCommerce tools, and more.
If you want to add a third-party tool to your Facebook Business Suite, just click on the tool you want. You’ll need to follow the instructions in order to set up the integration. In many cases, this will include sharing your login or API information with the third-party tool.
How to create appointments
The Appointments tool in Facebook Business Suite makes it easy for business owners to set up in-person appointments with potential clients and customers.
To create appointments (or to manage existing appointments), go to All Tools in the left-hand navigation menu. Then, under Sell Products and Services, click Appointments.
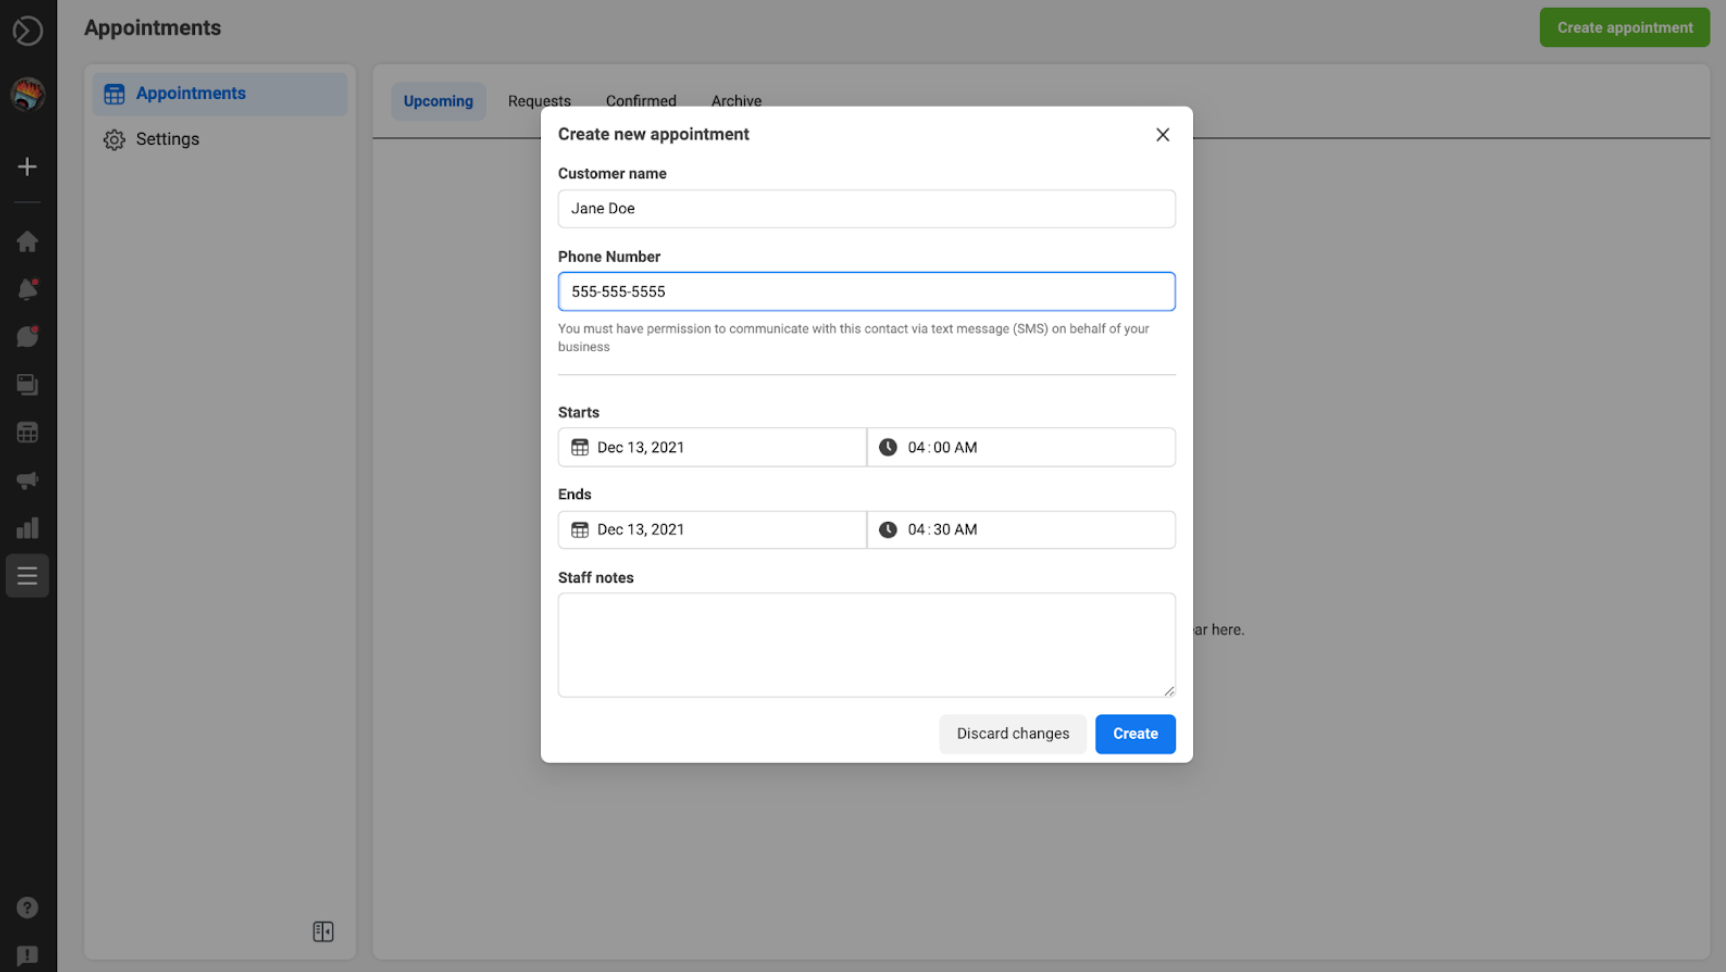
You’ll see any upcoming appointments and appointment requests on the dashboard. You can also manually create a new appointment by clicking the Create appoinment button.
Enter your appointment details, then click Create.
You’ll see a record of the scheduled appointment in your Appointments dashboard. If needed, you can cancel or reschedule it.
How to access your inventory and sales information
Interested in using Facebook Business Suite to manage on-platform sales? You can use the Facebook Commerce Manager to create shops, catalogs, and more for both Facebook and Instagram. Note that you’ll need to get started with Facebook’s Commerce Manager before you can access any of your inventory or sales through the Business Suite.
You’ll need to set up a shop and/or a catalog. Shops allow users to browse items in a “Shop” tab on-platform for Facebook and Instagram, and catalogs allow you to integrate with your chosen eCommerce solution to advertise products you sell off-platform.
Once you set up either, you’ll be able to dig into insights such as on-platform inventory and sales.
How to list your services on a Facebook Page
If you need to list, add, or remove services from your Page, it’s easy to do so via Facebook Business Suite.
First, click All Tools. Then, click Services (under Sell Products and Services).
Click Add a Service.
 Now, you can enter specific information about your service. This includes adding a photo, in addition to a name, description, price, and the duration of the service (and whether it’s flexible or fixed). Be as detailed as you need to be in order to help customers make informed buying choices.
Occasionally, revisit your Services to ensure your range of offers is still in line with your brand and that all the pricing is accurate. You can always add or take away services as needed in addition to editing them, and Facebook makes it easy to do that.
Final thoughts
Facebook Business Suite is a useful free tool for marketers, advertisers, and business owners. It integrates with Facebook, Instagram and Messenger, and you can use it with a number of other third-party platforms too.
As the platforms continue to expand and evolve, Business Suite will likely change too, offering new features to help keep up. It’s a good idea for brands to get used to the interface so they know how to use it when needed, even if they prefer more manual and singular Page management.
And keep in mind that if you ever want to look for an all-in-one publishing and analytics tool that will allow you to streamline management for every major social media site (and not just those under the Meta umbrella), tools like Hoosuite can help.
What do you think? Are you using Facebook’s Business Suite? What features are the most useful to your brand? Share your thoughts and questions in the comments below!










Great read! However – it might be me, but it seems as if when I publish something to my Instagram directly from Instagram and not the Business Suite, the post doesn’t appear in the Meta planner. If there’s a way to do this, it doesn’t appear to be intuitive.