The Beginner's Guide to Facebook Advertising
Chapter 2
How to Set Up Your Facebook Ad Campaigns
You’ll find out:
- What is Facebook Ads Manager
- How to use and navigate the Ads Manager
- How to set up a Facebook ad campaign in Ads Manager
- How to set up Facebook ad campaigns with AdEspresso
Ready to start creating your first ad campaign?
Facebook Ads Manager: the basics
The Facebook Ads Manager is where you will go to create and manage your ad campaigns.
You can use it to:
- Set up Facebook ad campaigns.
- Create new ad sets and ads.
- Manage Facebook ad bids.
- Target many different audiences.
- Optimize your ad campaigns.
- Keep track of your campaigns’ performance.
- A/B test your Facebook ad campaigns.
Understanding the Ads Manager’s ins and outs will be the key to you getting the most out of your Facebook advertising dollars.
How to use and navigate the Ads Manager
The Ads Manager is where you create and coordinate your ad campaigns.
Start by accessing the Ads Manager. To get there, you can click this link, navigate there from the Business Manager, or use Facebook’s Ads Manager Mobile App.
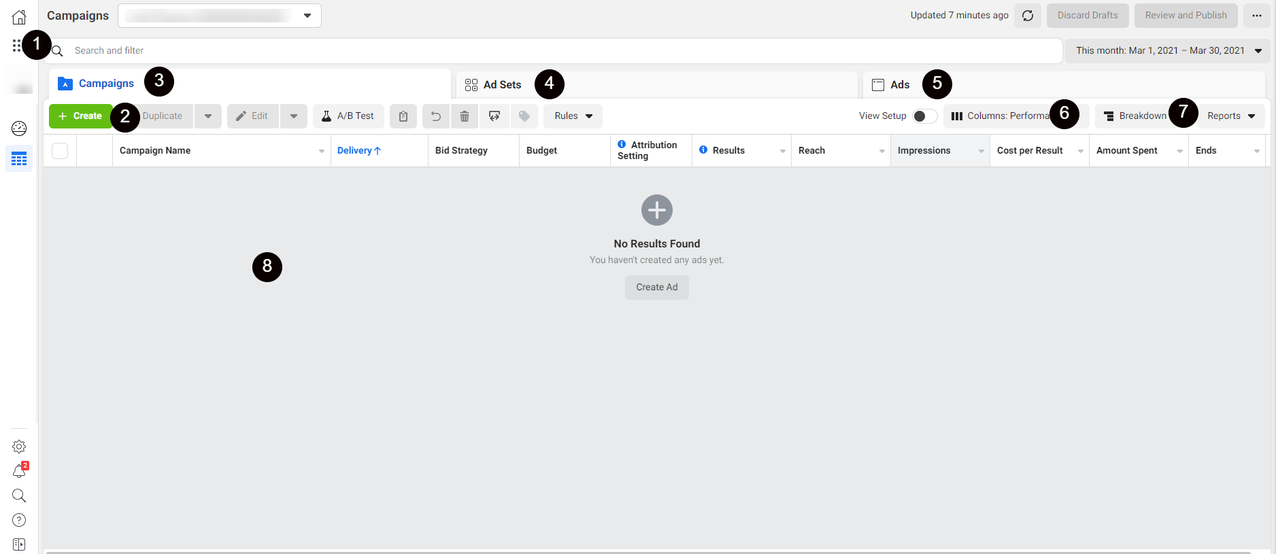
Let’s have a look at this map to get an idea of how to navigate a brand new Ads Manager dashboard:
- Main Navigation Menu: Click the dots icon to navigate to other tools like Business Manager or Audiences.
- Create New Ad Campaigns: Click here to make new ad campaigns.
- Campaign View: This view will give you info on all of your Facebook campaigns once you start running them.
- Ad Set View: This view will give you information on each of your ad sets so you can compare them.
- Ads View: This view will give you information on each ad you are running.
- Columns: Toggle different columns in this drop-down bar to display various metrics about your campaigns, ad sets or ads.
- Campaign Breakdown: Breakdown allows you to filter your results by time, delivery, or action.
- The Data Field: When you start making ad campaigns, this is the area all your data will be displayed in.
You should now have a pretty basic understanding of navigating the Ads Manager, so let’s jump into the fun part—our first campaign!
How to set up a Facebook ad campaign
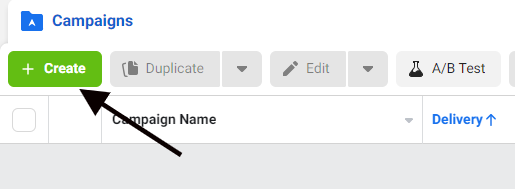
To create a campaign, click the green +Create button in the Campaigns tab of your Ads Manager.
Step 1: Select your campaign objective
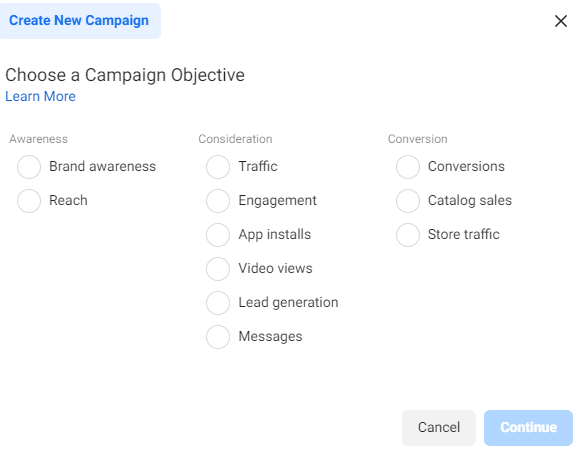
On Facebook, you can choose from a handful of campaign objectives that match your advertising goals. For example, if you are looking to drive traffic to a physical location, you would use Store Traffic. If you’re driving traffic to a website, you want to use Conversions.
Choosing the right objective is your first important decision when crafting your ad campaign. If you aren’t sure which objective is right for you, here is a quick breakdown of your choices:
- Brand awareness: Get your brand out in front of people’s eyes and build awareness around what you sell or do.
- Reach: Get your ad in front of as many people as you can to generate buzz.
- Traffic: Use ads to get people off of Facebook and on to your website.
- Engagement: Get people engaging with your brand online by encouraging people to comment, like or share what you have to say.
- App installs: Have your ads send people to the app store where they can download your app.
- Video views: Boost traffic to your Facebook videos, targeting people with the best odds of watching your content.
- Lead generation: Use forms to generate leads on Facebook that you can follow up on later.
- Messages: Use ads displayed on Messenger, WhatsApp or Instagram Direct to connect with new customers.
- Conversions: Push people to take that next step with your product, whether it’s starting a free trial or making a purchase.
- Catalog sales: Show off your online store’s goods with ads that encourage browsing and purchasing.
- Store traffic: Target locals and get them dropping by your actual physical store.
Facebook uses objectives to determine other elements of your campaign, such as available ad formats, bidding options and how it optimizes the campaign.
If you need more help with picking the right objective for you, check out our in-depth guide to Facebook Campaign Objectives.
Step 2: Give your ad campaign a name
Naming conventions for your campaigns can be an easy way to organize your campaigns as you scale and run more of them. It also sets you up for hyper-efficient reporting later on when it comes time to analyze your results.
Some examples of what you can include in your campaign name are:
- Client name/website
- Target audience/location
- Custom audiences
- Creative type
- Facebook Page
Hopefully, this gives you some good ideas to keep your campaigns organized and simplify reporting later on.
Step 3: Pick special ad categories, A/B test, and optimize the campaign budget
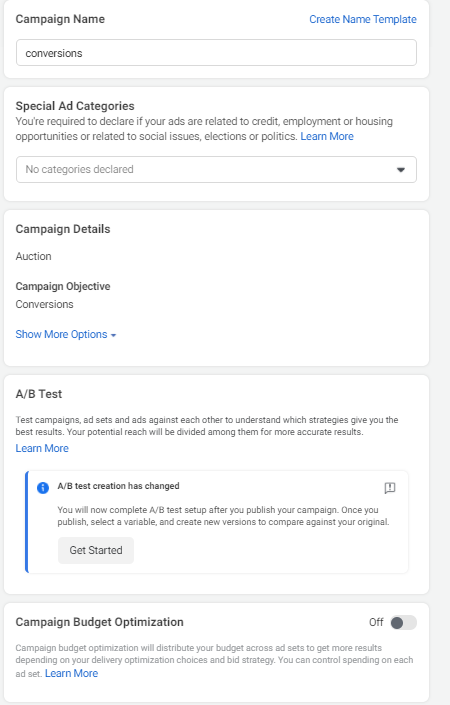
On the next page, we have to make some decisions regarding the campaign as a whole. These include:
- Special ad categories
- A/B testing
- Campaign budget optimization
First up, you need to declare if your ad will be falling under one of the Special Categories. Most ads will not, but it’s important to take a look to see if any of them apply to your ad.
Next, you need to decide whether you will be using A/B testing. Creating a split test, or an A/B test, allows you to run experiments and collect data that shows you the best-performing creative, placement, audience and delivery optimization strategies.
It’s always a good idea to set this up, so you can optimize your campaigns to be running as efficiently as possible. If you want to set up A/B testing right away, click over to our Facebook ads A/B testing guide for a walkthrough of the whole process.
Lastly, we have campaign budget optimization. When this feature is turned on, Facebook will determine how to allocate your campaign budget among your many ad sets in the most effective way possible. If you would rather not choose this, you can determine how much money will go to each ad set manually. We will go over this in more depth in Chapter 6.
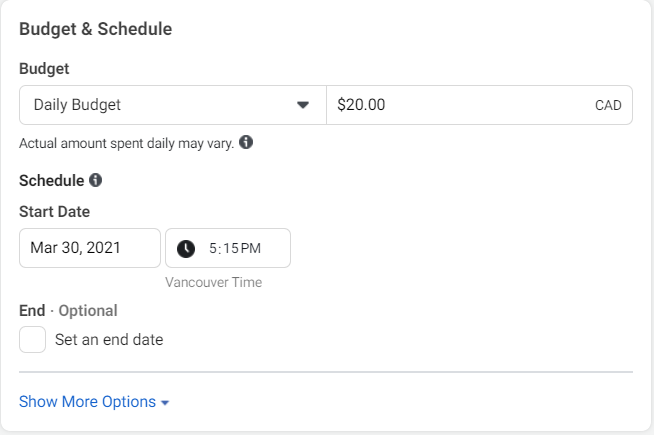
Step 4: Set up your campaign budget and bidding
Your Facebook ad budget and bidding options are such important topics that we’ve devoted the entirety of Chapter 7 to them.
Broadly speaking, you will need to choose:
- Your budget type (daily or lifetime)
- How much you will spend (over a day or the entire campaign)
- The scheduled start and end date of your campaign
Make sure to take your time with your budget. Spend too much, and you won’t have a budget for future campaigns; spend too little, and it’ll be hard to get the results you really want.
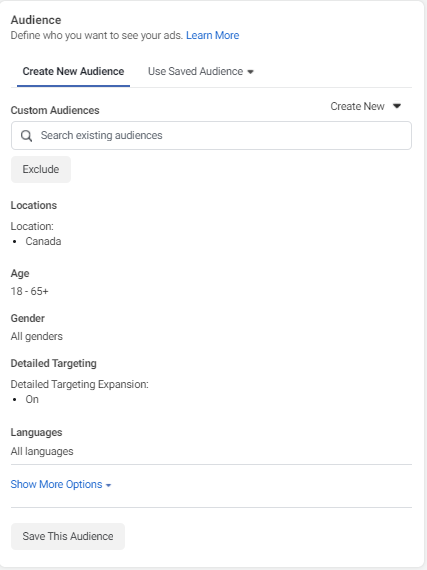
Step 5: Set up audience targeting
Facebook offers many powerful ways to target audiences, and we’ll talk more at length about creating these different audience types in Chapter 6.
In this phase of your campaign setup, you have two options:
- Create a new Facebook target audience.
- Use a Saved Audience.
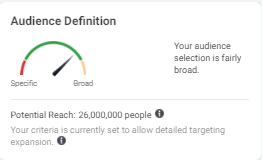
As you build your audience, Facebook will display your estimated daily reach and tell you if your audience is too big or too small using the meter on the right side of the page.
With Facebook audiences, you can target likes or interests on Facebook, behaviors and even demographics. All of this allows you to create very specific audiences to target in your campaign.
Setting up the right Facebook target audience is one of the most important things you will do while advertising on Facebook, so we’ll dive deeper into this later on.
Step 6: Set up your placements
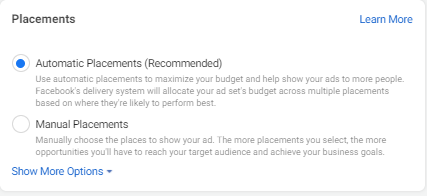
This is the step where you decide where on Facebook’s vast network you want your ads shown. Your choices, however, will be limited by the goal you have chosen for your campaign.
By default, Facebook will have automatic placements selected that they believe give you the best results. If you would like to, you can also opt to choose your own placements.
Here is a full list of all of your placement options:
Feeds
- Facebook News Feed
- Instagram Feed
- Facebook Marketplace
- Facebook Video Feeds
- Facebook Right Column
- Instagram Explore
- Messenger Inbox
Stories
- Facebook Stories
- Instagram Stories
- Messenger Stories
In-Stream Videos
- Facebook In-Stream Videos
- IGTV Videos
Apps
- Audience Network Native, Banner, and Interstitial
- Audience Network Rewarded Videos
Other
- Facebook Search Results
- Messenger Sponsored Messages
- Facebook Instant Articles
While Facebook does a pretty good job auto-optimizing your ad placements, it’s still important to do your own research with split tests. You can learn where your ads are having the biggest impact (for the least amount of money).
To learn more, you can read Facebook’s rundown on each of their available placements.
Step 7: Set up your Facebook ads
This is the final step of the campaign creation process. Here, you can select your preferred Facebook ad type and insert your ad images and copy.
We will be doing an in-depth lesson on building the best possible Facebook ads in the next chapter, but for now, let’s take a look at the basics of what you need to get done to get your ad put together.
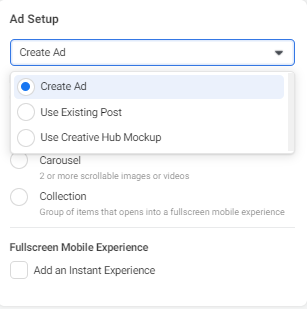
To start, you’ll need to choose to either:
- Create a new ad.
- Use an existing post from your page.
- Use a Creative Hub mockup.
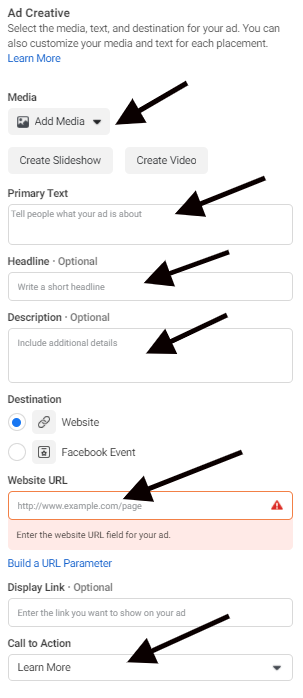
If you are creating an ad from scratch, you’ll need to input all the elements that make up your ad: the images, videos, copy, etc. All of these can be found in the Ad Creative section.
When you are done filling in all of this information, click Publish.
That’s it — you’ve made your first ad campaign on Facebook!
How to set up Facebook ad campaigns with AdEspresso
Many people find Facebook Ads Manager too complex, clunky and confusing to use.
AdEspresso is a web-based solution that allows you to create complex campaigns and run split tests without all of the extra fluff and inconvenience of using Facebook Ads Manager.
There are several benefits to using AdEspresso:
- It takes less time to set up ad campaigns with multiple creatives and copies.
- You can access Ads Manager features without things getting complicated.
- You get advanced campaign reports and can easily optimize your ad campaigns.
- You can automatically generate PDF reports of your data for easy analysis.
- You can sync leads to your CRM.
- You can create Google Ad Campaigns within the same dashboard as Facebook ad campaigns.
- And much more!
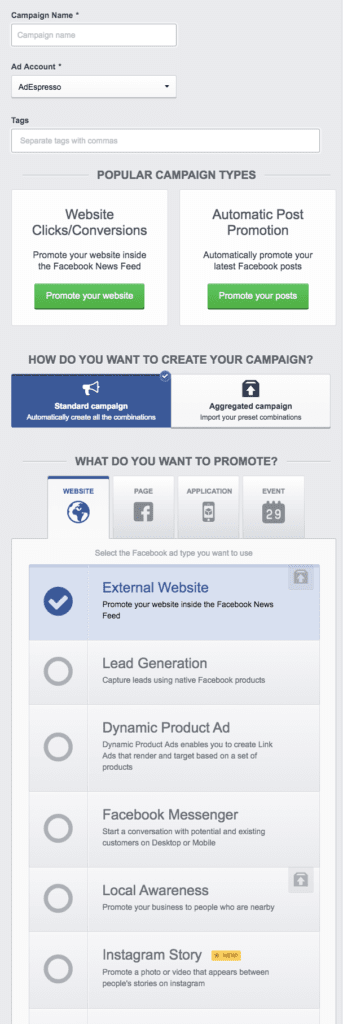
To start, can click New campaign in the top left of the home screen after signing into your AdEspresso account.
The campaign set up in AdEspresso is similar to the one in Ads Manager—you’ll be walked through all the campaign creation step by step in a clear and logical order.
The first step is naming the campaign and deciding the type of campaign you wish to create. In AdEspresso, you can make a Google ad campaign or a Facebook campaign. Today, we’ll show you how to create a Facebook campaign.
You can create your Facebook campaign from a draft or previously published campaign, or start from scratch.
For this example, we’re going to make an External Website campaign, which is the equivalent of a Conversions campaign objective on Facebook.
One of the best things about AdEspresso is that it lets you add and test multiple ad elements to see which one works best.
All you have to do is click the + button to add additional variations. AdEspresso will automatically create all the different ad combinations.
The more split tests you run, the more budget you will need for the campaign — but the split tests will give you valuable information you can use to lower campaign costs later on.
Interested in learning more about campaign management in AdEspresso? Then you can’t miss this guide: How to Create Your First AdEspresso Campaign.
Are you ready for the long haul?
Now that you’ve got a general overview of how the Facebook campaign setup works, let’s dive into the details of how to select the right ad types and create successful ads on Facebook!
Proceed to Chapter 3 to learn how to choose the right ad type for your business.

