The Ultimate Google Ads Guide
Chapter 3
How To Setup Your Google Ads Account
You now know how Google Ads works. And you know the top three reasons as to why advertising on Google Ads is worth your time, money and effort.
Now it’s time to capitalize and create your free Google Ads account to get started ASAP.
In this section, we will walk you through the setup process, help you decide between Google Ads and Smart Campaigns, and show you the key factors most people miss in the setup process that hinders their progress and advertising potential.
Without further ado, here’s how to set up your account for success.
Google Ads or Smart Campaigns?
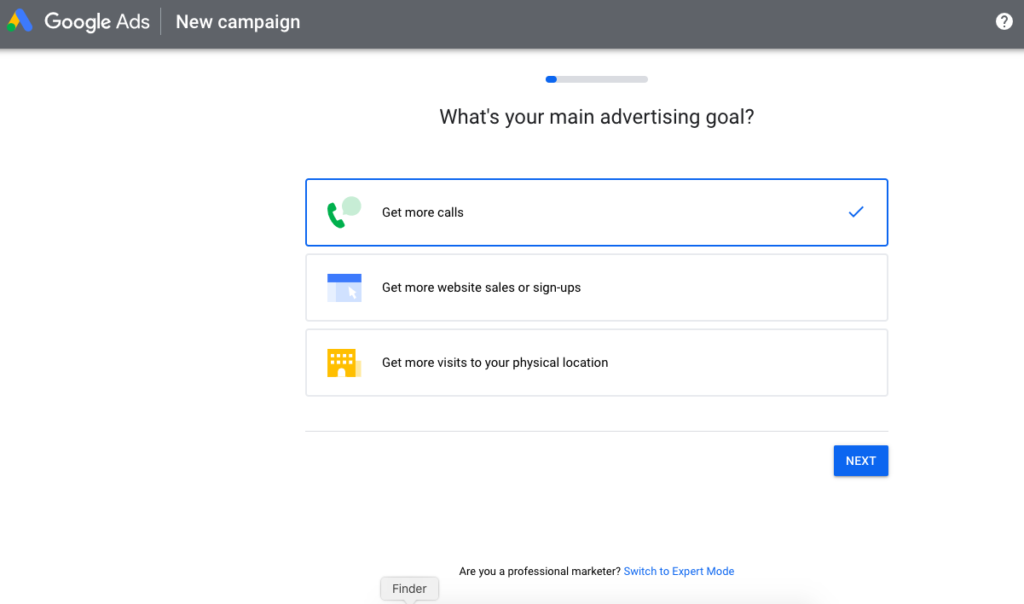
One thing you will notice when attempting to signup for a new Google Ads account is that you have the option to switch to Expert Mode (Google Ads) or continue creating your Smart Campaigns account (previously AdWords Express).What is it? How is it different than Google Ads? That’s what this section is all about.
To summarize it:
Smart Campaigns is a simplified, automated version of Google Ads where Google handles most of the work.
It’s only available for local businesses with stores or an online e-commerce shop.
If you don’t have a physical store or an online store, you can’t use Smart Campaigns.
With Google Ads, things can get complicated fast.
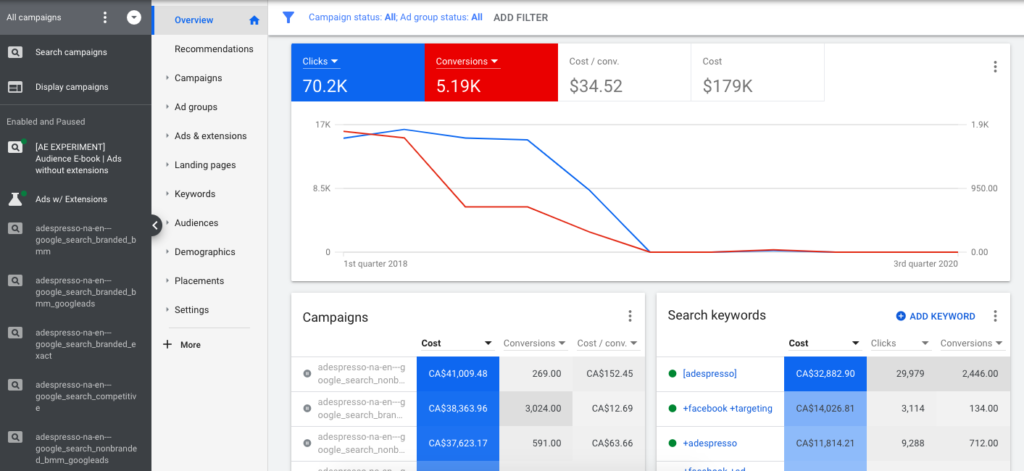
Just look at the standard dashboard:
It’s complex and contains dozens of sections with different metrics, reports and more.
It can take a ton of time to manage every week.
Smart Campaigns is best for users who:
-
Are brand new to PPC advertising
-
Are limited on time or resources
-
Own stores and want to generate extra revenue without much work
But beware: Smart Campaigns is very simplified. After a period of time, you will likely find your sales stalling at a certain point with very little room to improve performance.
Google Ads packs so many features to improve your account that Smart Campaigns does not.
If you are brand new to paid search or have limited time, Smart Campaigns is a great way to start out. But sooner or later, you will likely realize that you need to switch to the full Google Ads experience.
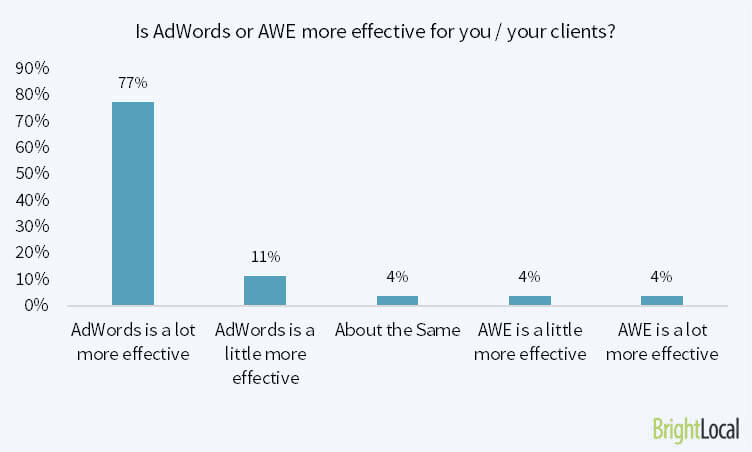
In fact, most PPC marketers who have used both, state that Google Ads is much more effective than Smart Campaigns:
Smart Campaigns is great for very small operations. If you are running a small shop where you have just a few (or even zero) employees besides yourself, Smart Campaigns is going to be a lifesaver!
Since Google handles the majority of the work, you can build some great sales without giving up your “free time.”
Hah, good one. 
If you end up choosing to run with Smart Campaigns, follow our guide to maximize your results.
If you want the best of both worlds, you can use AdEspresso to create and manage your Google Ads campaigns. Advanced split-testing (which we’ll get to later) combined with easy to interpret analytics and all of the tools and features you need to create a successful campaign makes AdEspresso a powerful marketing hub.
Creating Your Free Google Ads Account in Just Five Minutes
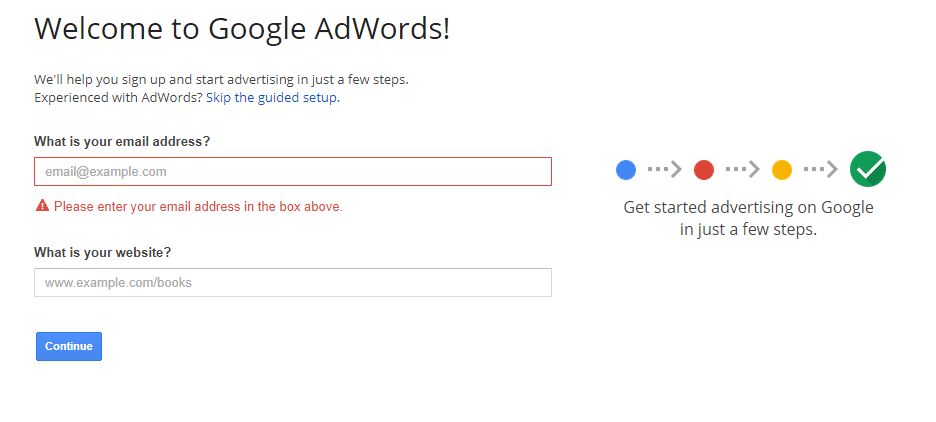
To create your free Google Ads account, if you don’t already have one, head to Google Ads and sign up using your email and website URL:Next, you will likely notice a whole bunch of overwhelming setup factors that you aren’t even sure of yet:
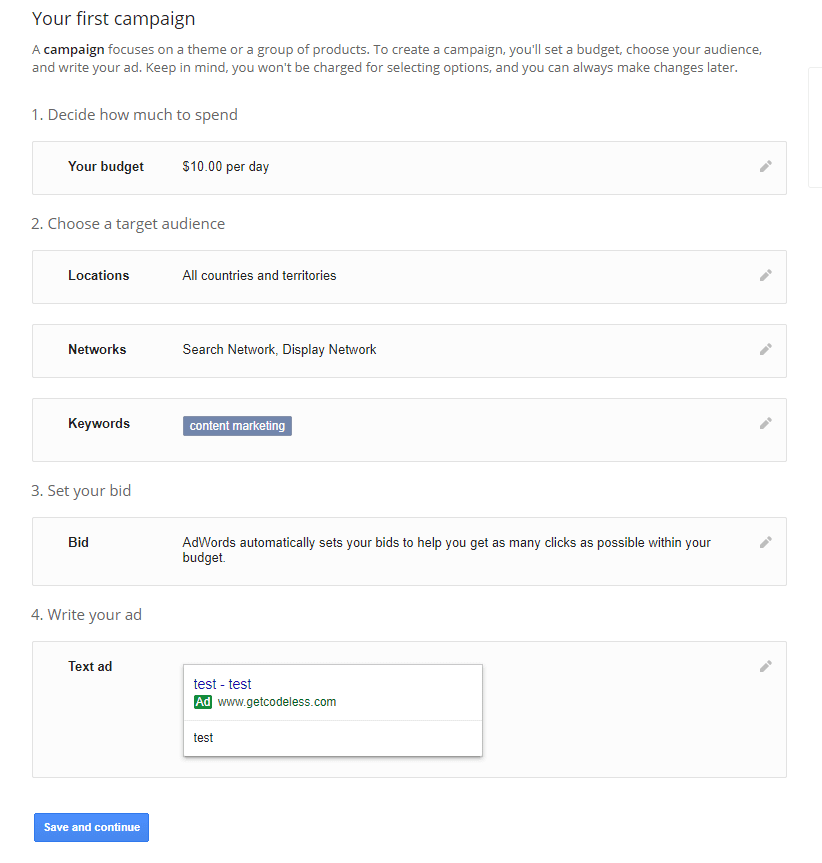
For example, budgets, targeting, bidding and already writing a text ad.
Let us walk you through the key factors here.
First off, for your budget, start small. You can always increase from here, and the beginning stages are always going to be random.
Set a comfortable budget that allows you to bring in some traffic and conversions without breaking the bank just yet.
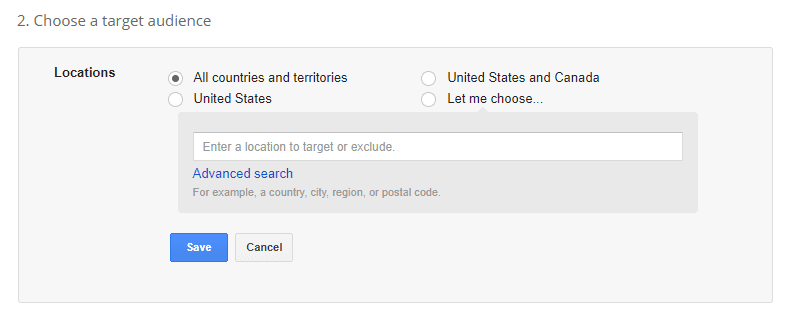
When choosing your targeted audience, start by selecting locations that you want to target:
Do you only sell products to the US? Select that. Are your products sold worldwide? Select “All countries and territories.”
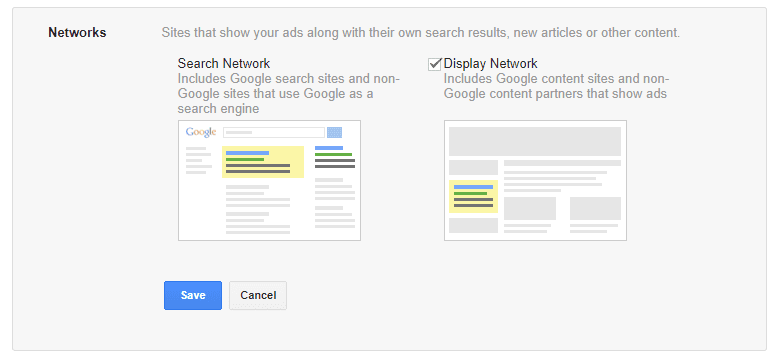
When choosing networks, as we discussed earlier, select the networks you want to focus on the most:
We recommend simply selecting both, as you can easily change this later and will likely want to use the display network for remarketing at some point in the near future.
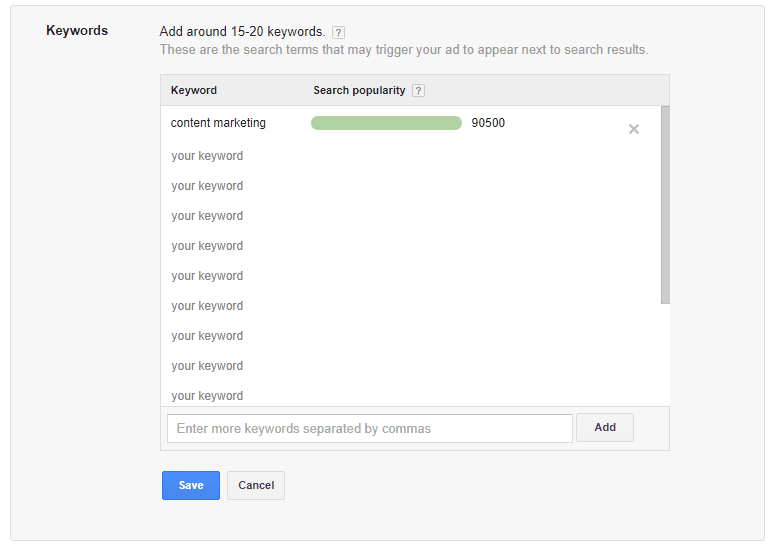
Lastly, for keywords, enter a few that you want to focus on in relation to your business or specific products you want to sell.
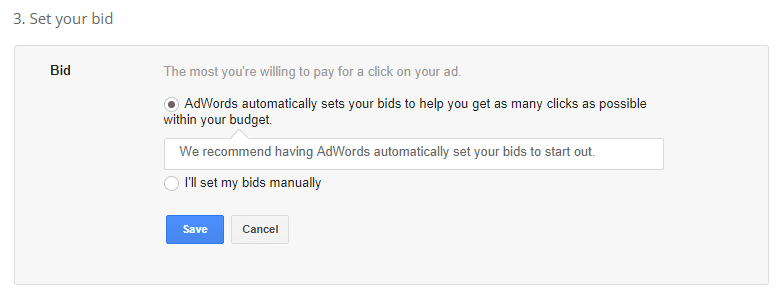
For what bidding, let Google Ads automatically set your keyword bidding for the start (bidding options and detailed guides for bidding can be found in Chapter 7):
Your daily budget won’t change, and Google Ads will never spend more than what you set, so don’t worry!
Next, write a basic text ad and click continue.
Once you enter your payment and hit continue, your Google Ads account is live and ready to use.
Voila! That’s it.
Remember: you can edit all of this later! And we will walk you through the campaign setup including ads, keywords, and more.
But before you jump into any campaigns, there are a few more key factors -that most will overlook in the account setup process- that are critical.
Critical Factor #1: Link Google Analytics
This is a crucial way to generate better reports and data that can help you make better marketing decisions.
Without it, you can’t compare the success of paid search to organic or social traffic.
Plus, Analytics has better call-tracking data than Google Ads, making it an excellent addition to call-based campaigns.
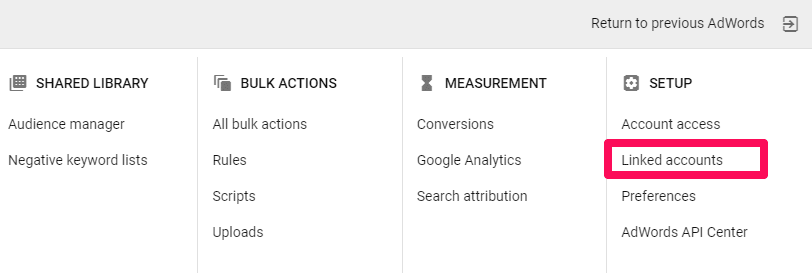
To link Google Analytics, navigate to your “Linked accounts” in the toolbox:
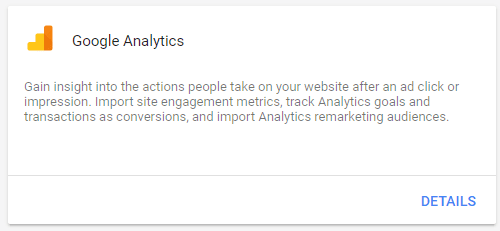
Select the Google Analytics option and follow the on-screen instructions to link your accounts:
After you link Analytics, it’s time for one final step: UTM codes.
Critical Factor #2: Use UTM codes
UTM codes, otherwise known as Urchin Tracking Module, is a link format used by Google to track specific details within a normal link.
For instance, you can use UTM codes for tracking data like keywords that drove the click, campaigns, ad groups and more.
This specific data can help you better analyze your traffic and where it comes from.
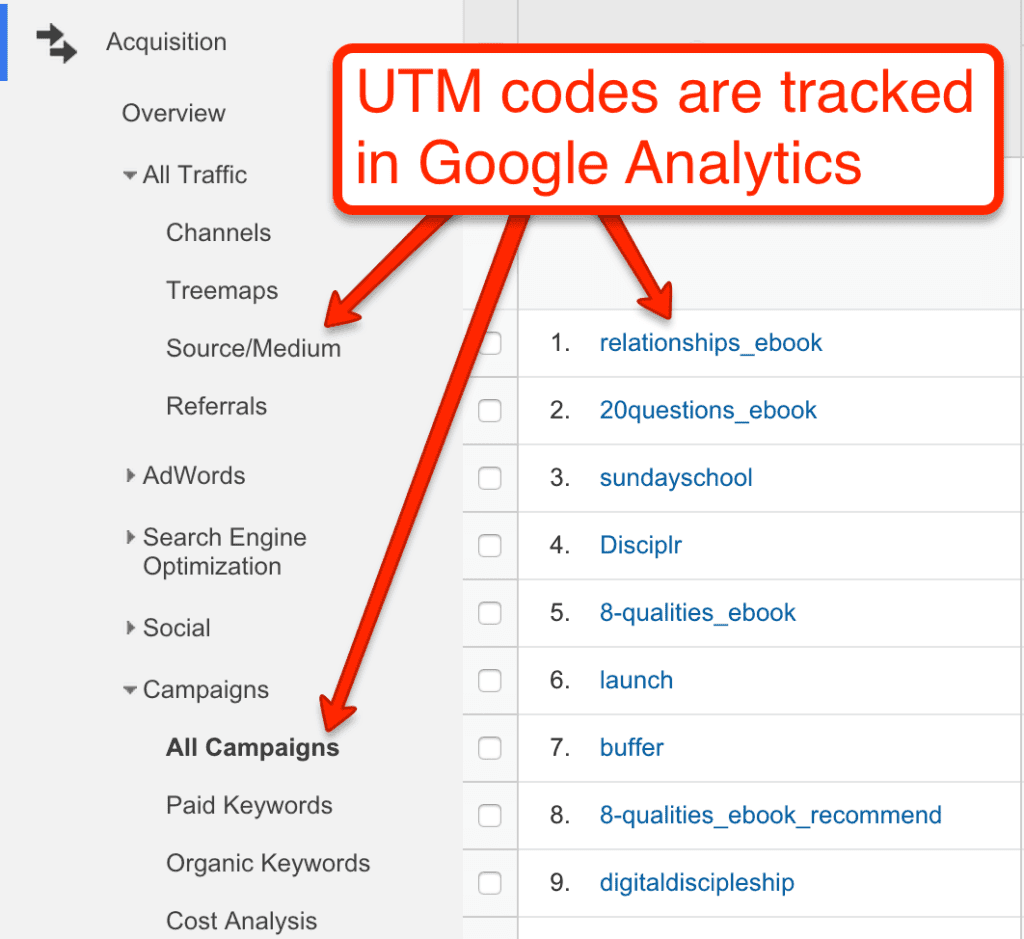
And when combined with Google Analytics linking, you have a powerhouse of data:
Without UTM codes, your Analytics would simply say “Paid search.” And that’s helpful to nobody.
Sounds great, right? Absolutely. But they often come with a catch:
They are a pain in the butt to install and use regularly, especially when you are creating multiple landing pages.
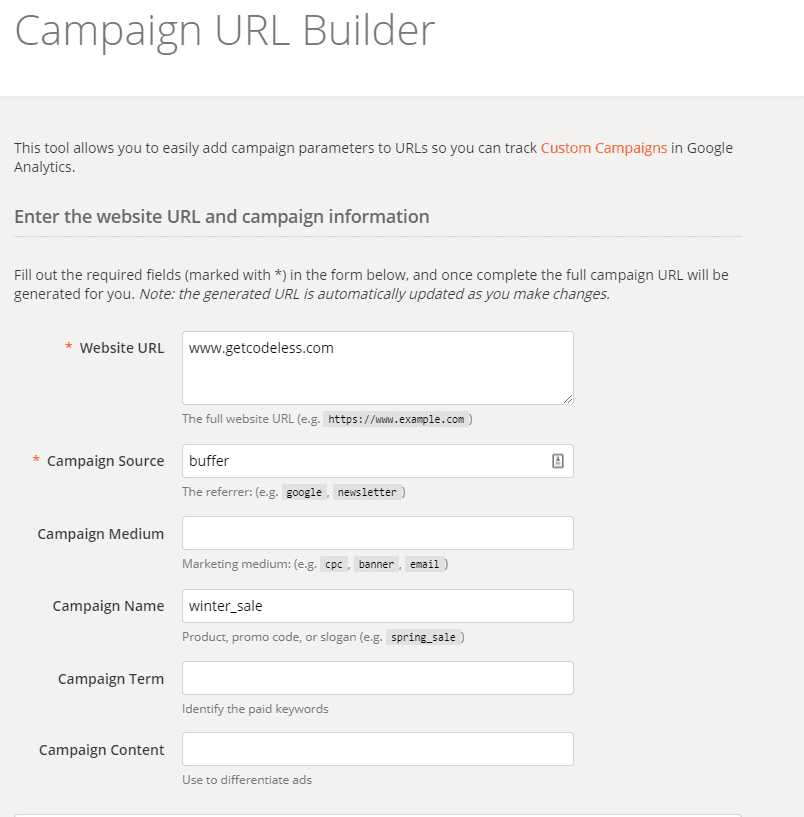
UTM codes can be built using Google’s UTM tool, but creating any more than just a few new links will take you tons of time:
Retyping all of your data like source, medium, name, terms, and content can be a frustrating experience. And Google Ads is already complex enough.
But luckily for you, there is a semi-secret hack to applying UTM codes once.
How? By applying them directly in Google Ads at the campaign level instead of on every single ad’s final URL.
To do this on your account, head to the campaign settings section of your dashboard, select all your campaigns, and click “Edit.”
The edit menu will drop-down. Choose “Change tracking templates” to continue:
Now you should see a box that says “Set tracking template.”
In that box, paste the following code:
?matchtype={matchtype}&network={network}&device={device}&adposition={adposition}&keyword={keyword}
This code tracks your keywords, match types, network, device and even your ad position!
Now when setting up new campaigns, you never have to worry about doing the UTM process.
You can kick back, relax and watch Analytics populate with invaluable data that took you only two minutes to set up.
Next up: conversion tracking.
How To Setup Conversion Tracking (And Why You Need It)
Now that you have linked Google Analytics and the basics of your account are good to go, it’s time for one final setup item: Conversion tracking.Conversion tracking is relatively simple:
Setting up scripts on your website to allow Google Ads to track how many people buy from you.
While this process seems simple in nature, most people don’t understand how it works, how to set it up properly, or why they even need it in the first place.
In fact, one study of over 2,000 Google Ads accounts found that only 29% of the accounts had conversion tracking setup.
71% of accounts had no conversion tracking or had set it up improperly, causing faulty and unreliable data and reports.
That’s not good.
Without proper conversion tracking, you are basically shooting blind. You’re throwing money at something without any idea of how it worked.
Let us run through a scenario with you.
Titolo
You just set up your account. You are running new campaigns in no-time, spending $500 a day on Google Ads. Until you look at your reports and data and realize you have zero conversions.
How? No conversion tracking.
Sure, real conversions and sales were happening. But how many were from Google Ads? How much are your acquisition costs? You have no clue if you are even profitable.
Conversion tracking is one of the most (if not the most) essential factors in a successful Google Ads account.
So, how do you set it up?
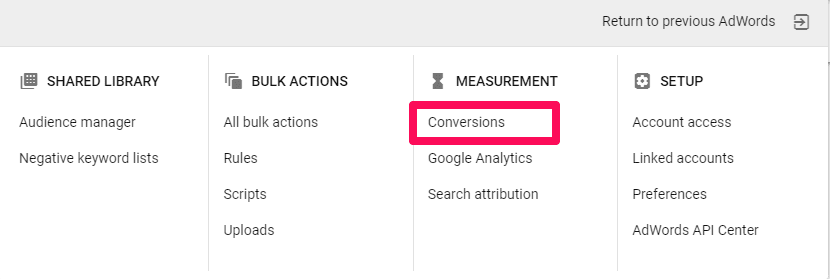
It’s simple. Head over to the conversions section of your dashboard:
Select the blue “+” button to create a new conversion.
From here, you can decide between four types of conversions:
As you can see we can:
- Website: tracking conversions on your site, store, etc.
- App: track how many people download your app
- Phone: record how many phone calls your ads generate
- Import: import your own conversions (not recommended unless you have great outside conversion tracking software already)
More than likely, the most common conversion tracking elements you will use are website codes and phone call tracking.
Give your new conversion tracking element a name that you can recognize in relation to your campaign.
Next, select the category of your conversion:
Is it a purchase or direct sale? A form sign-up? A generalized lead?
Here is your chance to specify exactly what a conversion is to each campaign you run.
In terms of the value, you can opt to select no value, same value or use a specific value for each conversion:
If you decide to use specific/different values for each sale (most commonly used for online stores and ecommerce), you can follow Google’s setup to edit your tracking tags accordingly.
Click to continue, and you will have three different options for installing your new codes:
- Self-install (install the tag yourself)
- Email the tag to a webmaster
- Use the tag manager
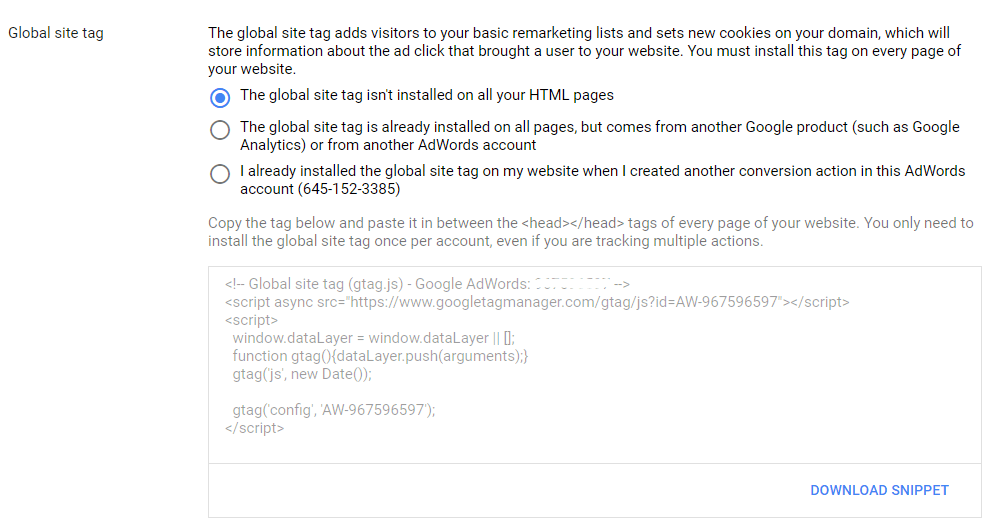
If you opt to install it yourself, first you must install the global site tag for Google Ads.
This will allow you to create remarketing lists where you can bring back users who engaged with you in previous marketing campaigns.
You need to install this tag on every page of your website.
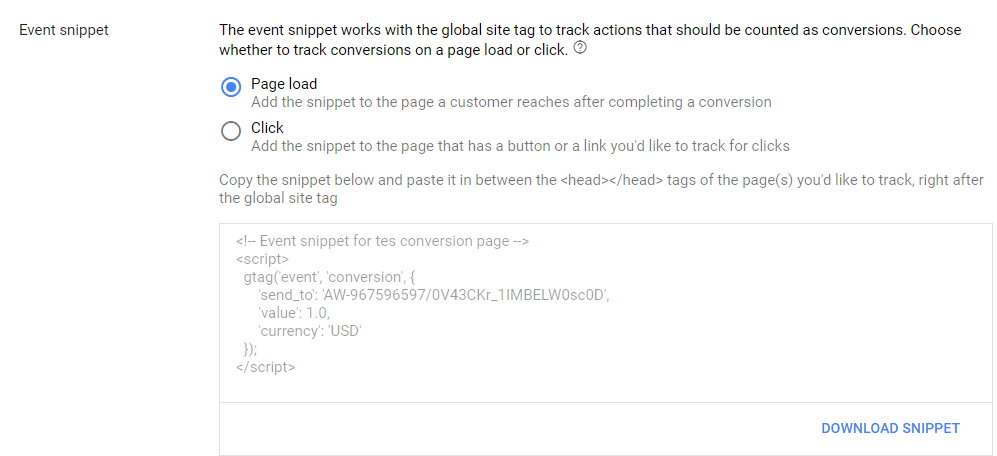
Next, you’ll want to install the “Event snippet,” which is what you just created when selecting value and type.
Install your Event Snippet
The easiest way to install your event snippet is using the “Page load” method.
What is it?
Essentially, you want to place this tag on a final destination or thank you page only, not every page of your site like you did with the global tag.
This code is meant for a page that customers will land on after completing their conversion action.
For instance, if someone buys a product in your online store, they should be directed to a “thank you” page after purchasing that only buyers will be directed to. This is where you place the event snippet.
This way you can ensure that the page only loads and records a conversion when someone buys from you!
This seemingly simple idea is easy to complicate or install wrongly.
Let’s recap to make sure you’ve got it down:
- Global site tag: your global Google Ads tracking script that goes on every single page of your website.
- Event snippet: individual conversion tracking scripts that you make for each campaign. These go on thank you pages only.

