The Ultimate Google Ads Guide
Chapter 5
How To Setup Your First Ad Group and Write New Ads
Setting up your account in Google Ads isn’t a simple process, unfortunately.
How your campaigns and ad groups are created and setup are some of the most important factors when it comes to improving your click-through rate, quality score, and general performance.
Using the wrong setup makes your account and campaigns hard to manage. On top of that, writing great quality ads on Google Ads can be strenuous due to the limited character space.
If you haven’t had experience writing ads, it can quickly become frustrating.
In this section, we’ll walk you through setting up your first ad group
and writing Top Google ads.
Step-by-step setup instructions and a bunch of formulas for writing the best quality ads at scale is what you get if you keep on reading!
Ad Group Setup: Single Keyword Ad Groups (SKAGs)
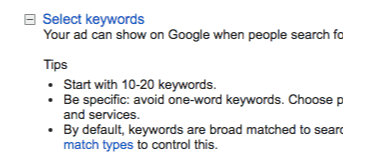
When starting your first ad group on Google Ads, Google gives advice that is easily misconstrued by new PPC advertisers:Did you see it? “Start with 10-20 keywords.” Start with?? 😖 That’s a lot of keywords for a single ad group.
Way too many, in fact. Why?
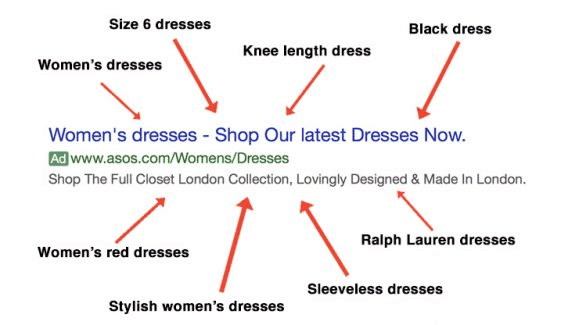
When you add too many keywords in a single ad group, you run the risk of showing ads that can’t possibly relate to all your keywords:
Ad group success boils down to one major factor: Specificity.
If your ad groups contain dozens of similar keywords like the image above, it’s still not specific enough.
If someone searches for size six dresses, they don’t want to see an ad with text about a sleeveless dress. Despite being contextually similar, those keywords are worlds apart.
Even simple changes between keywords are going to cost you potential sales.
People want what they searched for. Exactly what they searched for.
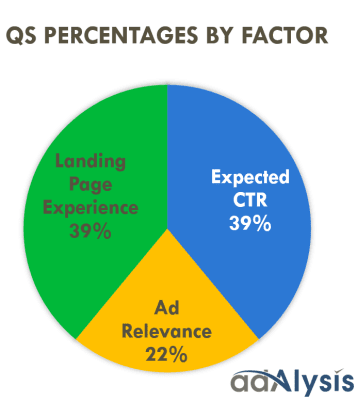
It’s why “Ad Relevance” is a massive factor in calculating your quality score:
If you aren’t giving relevant ads to searchers, they are going to click elsewhere.
The best way to ensure that every ad you post generates interest is to vastly simplify your ad groups.
And that’s the practice of creating single keyword ad groups, otherwise known as SKAGs.
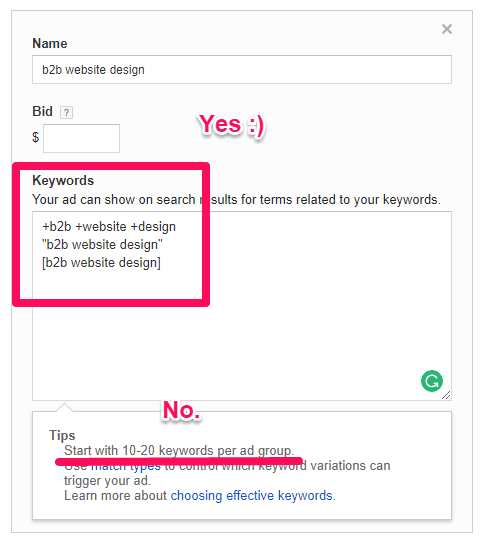
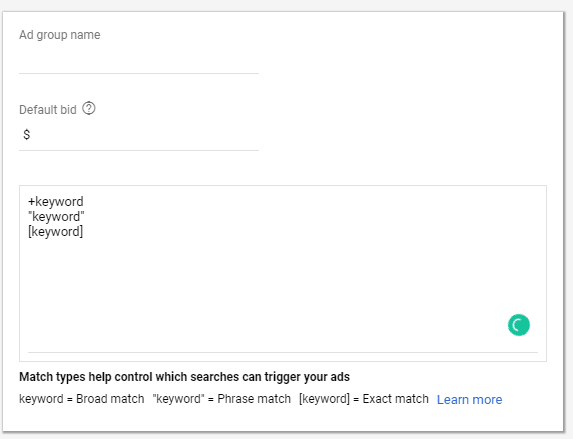
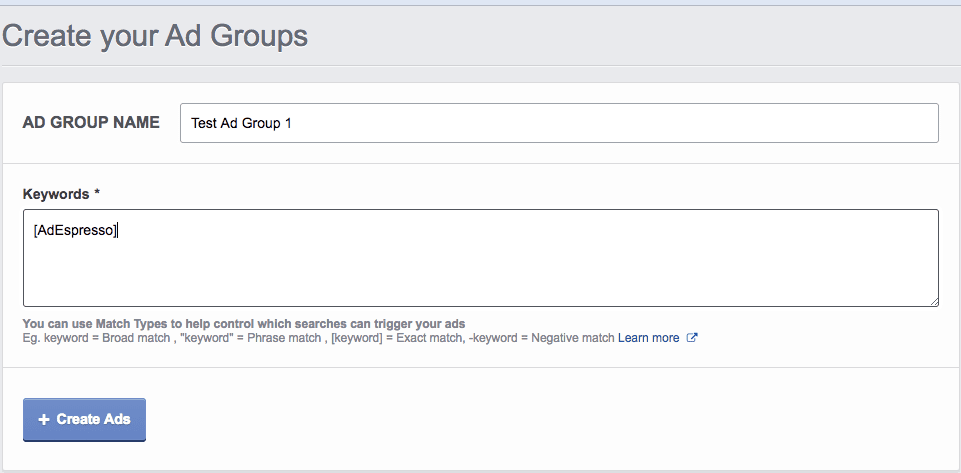
Here’s what a single keyword ad group (SKAG) looks like:
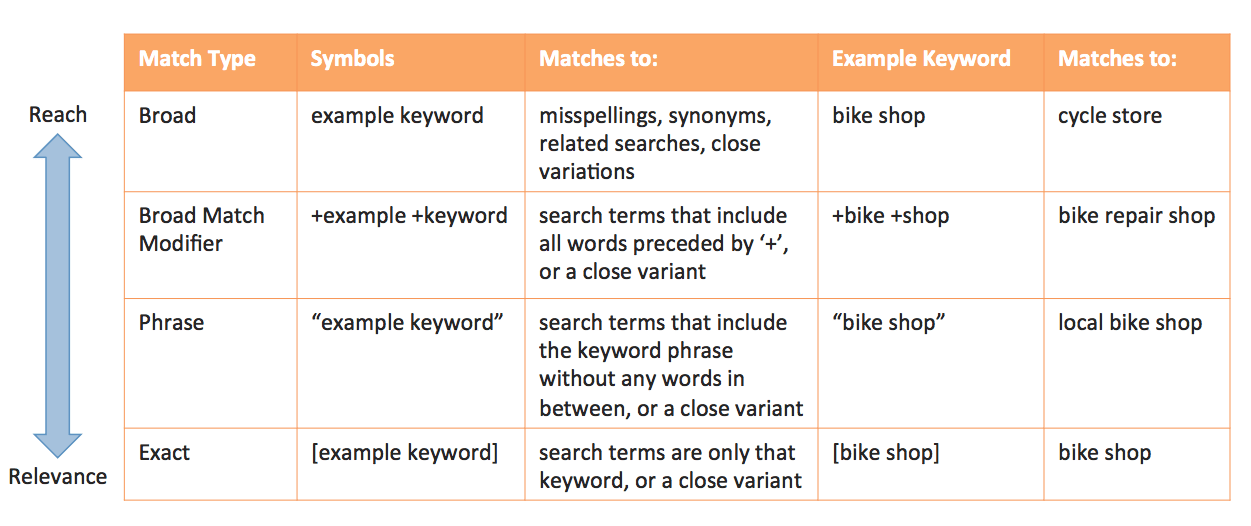
Taking your single keyword, you can use that keyword with three different match types like the example above.
- Broad match modifier: +keyword
- Phrase match: “keyword”
- Exact match: [keyword]
Or, you can get even more specific by using only a single match type.
The choice is up to you, and many PPC experts will have their own favorite method.
Personally, I’ve found great success using those three match types. They work together well to combine reach and relevance while producing high-quality scores.
And I’m not the only one. ConversionXL improved a client’s quality score from 5 to 8, and their CTR jumped by 28.1% using SKAGs.
How to set up your single keyword ad group
All you have to do is pull keywords from the list you developed earlier in this guide during the keyword research portion into your new ad groups.
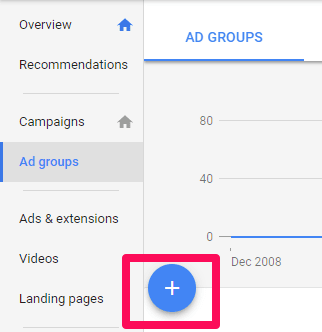
To do this, head over to the ad groups section of your dashboard and create a new ad group:
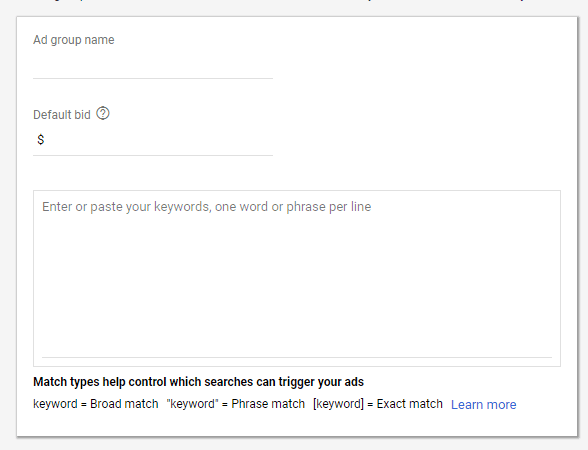
For the purposes of clean, easy to access account organization, give your ad group the name of the keyword you are going to use for this ad group.
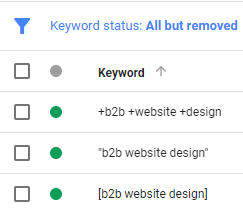
For instance, one of my current ad groups is named “b2b website design”:
And the keyword(s) contained in this ad group are also b2b website design:
This is my single keyword ad group.
Giving it the name of the keyword you are using will make your Google Ads experience feel 100x better as you can see exactly what keywords are in your ad group without ever clicking on them.
Next, you should see two more options: Bidding and keywords.
In the keywords section, enter your keyword in the three match types discussed earlier:
For bidding, reference back to the keyword planner tool on Google Ads that you used earlier (chapter 4). Remember the specific metric “Top of page bid (high)?”
Set that as your default bid, otherwise known as the max CPC for this ad group.
That would be the maximum cost you will pay and will ensure that you are in the running for the top few spots on the first page results.
Hit “Save and Continue” and move on to the next section!
Writing New Ads: How To Write 3-5 Ads Per Ad Group At Scale
Writing ads on Google Ads is a tiring process. You have character limits and writing anything compelling in a short limit can feel next to impossible.Due to this, most people write a single ad and then move on.
After all, all you need is one great ad, right? I wish.
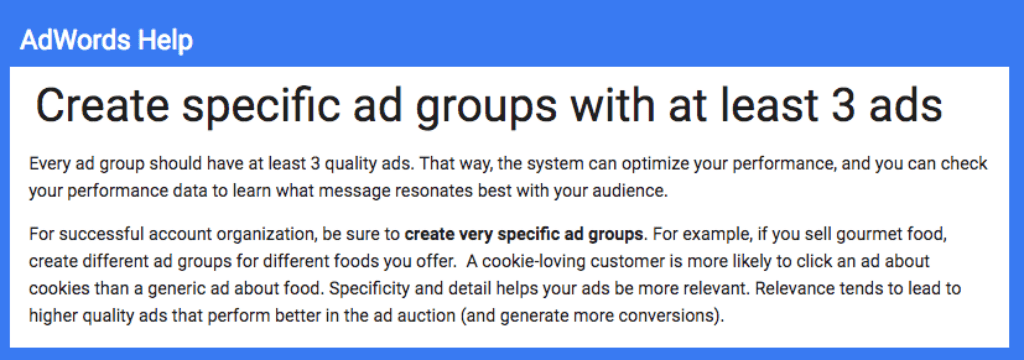
According to Google, you should always
“create specific ad groups with at least 3 ads.”
They even confirm the idea of creating SKAGs to help with ad relevance:
Why do you need so many ads? Because your ad groups will automatically rotate ads and show the ads that perform the best.
It’s essentially built in split testing that can help you refine your ads, value proposition, and calls to action over time.
For instance, while your first ad may have a CTR of 2%, maybe writing a new one that’s better and more compelling can increase that CTR to 5%. Then you can try using ad extensions in your next ad to increase CTR even more.
This process helps to get the most out of your ads. But obviously, it requires a bit more work.
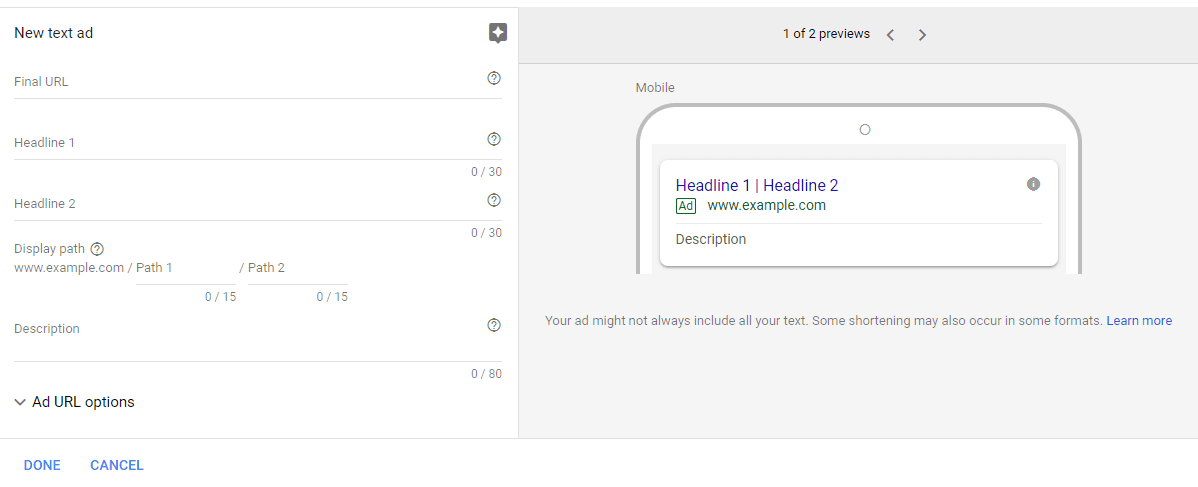
To write your ads, you will notice a bunch of different factors in the anatomy of a Google ad:
- Final URL: the destination that searchers will land on when clicking your ads. Otherwise known as a landing page.
- Headline 1: First headline space
- Headline 2: Second headline space
- Display Path: 15 characters to customize what your URL looks like to searchers
- Description: 80 characters to describe your offer
The trick here is knowing what to include.
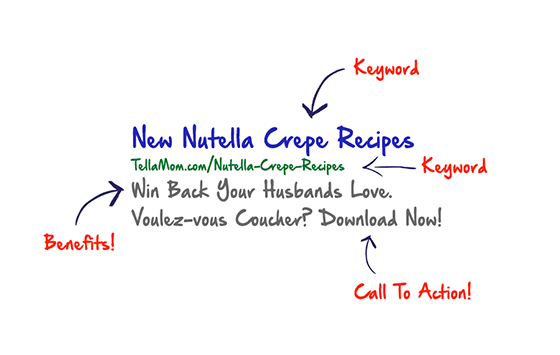
One of the best templates for writing dozens of Google ads in just a few minutes is keeping it simple.
Focus on the benefits, keywords, and using a great call to action
Using the keyword of your ad group in your ad will help you with specificity and ad relevance.
Benefits are a great way to entice users to keep reading and click through.
And your call to action is a great way to remind the searcher of exactly what you want them to do.
This simple yet effective ad is easy to craft for any keyword.
From here, you can start to subtly modify the ads by tweaking your call to action and benefits to see what offers are most compelling to searchers in your space.
Test different discounts or offers and different contact methods like phone calls.
Once you’ve created your ads, you can start to use ad extensions to help you boost your click-through rate.
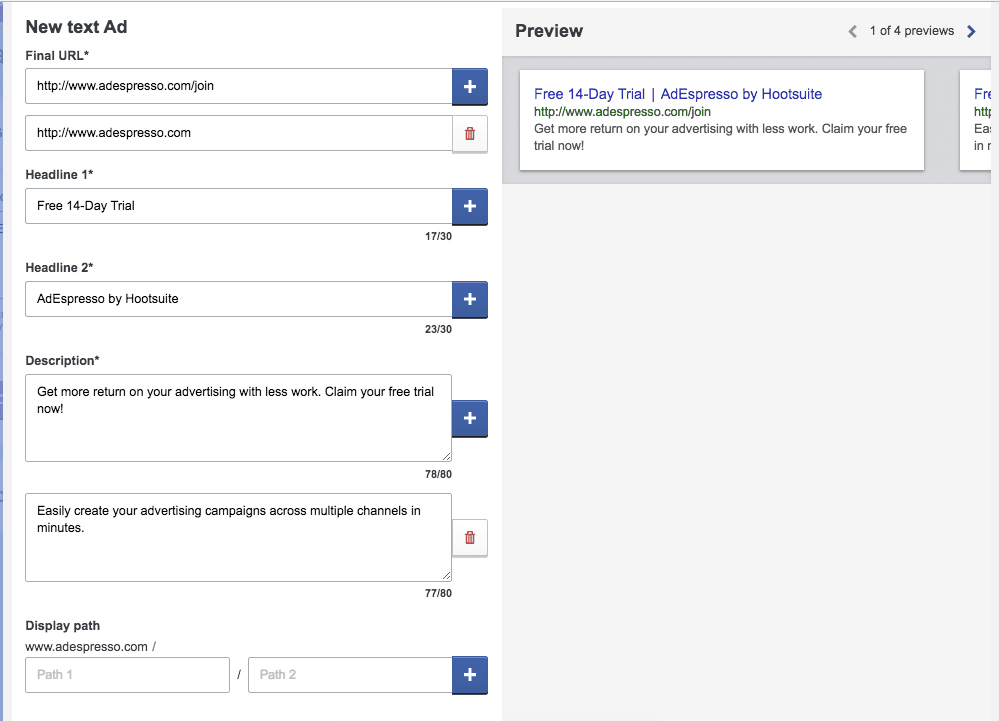
Now, this is where the aforementioned Adespresso split-testing comes in handy. As you just saw, you’ll need to create 3 different ads (at least) to run an effective campaign. With our latest addition of Google Ads into the Adespresso fold, you can easily split test creative elements from one page.
On step 3 of the Google Ads Creation process, you can set up your SKAG and then select the Create Ad button.
Now, you can quickly create a test on any part of your ad you need. In this example, we’re testing 2 different benefits versus 2 different URLs.
Instead of having to create 1 ad 3 times, we now have all the ads needed for our first test.
How To Use Ad Extensions in Google Ads
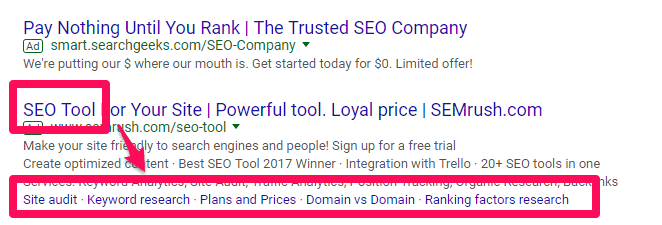
Ad extensions are nifty add-on features in Google Ads that can help you provide additional information that normally can’t fit in the limited character space of a Google ad.For instance, things like additional links to your website:
These related links will help you boost click-through rates by providing alternate points of interest for potential searchers.
If they don’t find your original ad text compelling, they might find a link interesting enough to click.
And according to Google, ad extensions can raise your CTR by 10-20% on average!
Ad extensions come in a variety of options that can fit dozens of different goals.
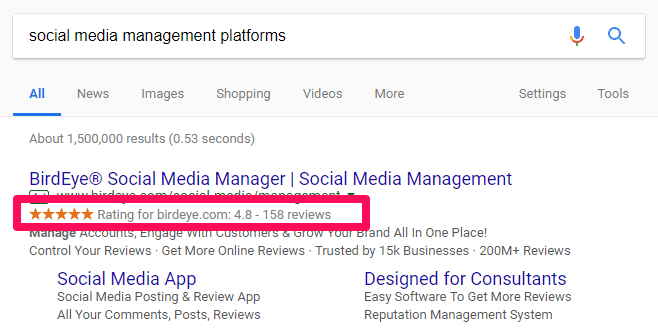
For instance, if you sell an online product, you can use review extensions to showcase ratings and user reviews:
Currently, Google Ads offers the following ad extension options:
- Location extensions: used to showcase your businesses address. Can be great for driving local store sales and foot traffic.
- Affiliate location: if you sell products in third-party retailers, you can display local stores nearby a searcher where your products are carried. For instance, if your merchandise is at the local Best Buy, that store location would show up.
- Callouts: add additional text to your ads. Great for coupons, discounts, and calls to action.
- Calls: showcase your business phone number to encourage phone calls
- Message: allow searchers to text message your business from the ad
- Sitelinks: add more sitelinks to relevant pages
- Price: show the price of your product on the ad itself
- Apps: link to your application for downloading
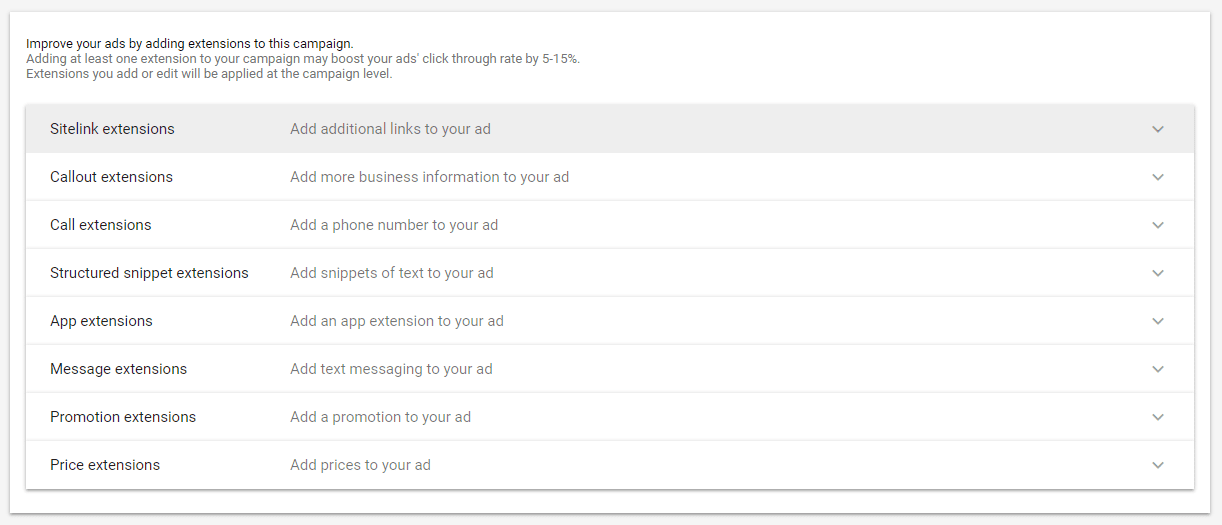
Once you’ve written your first ad, you can start to apply ad extensions right below it:
Simply select the ad extension you want to use and begin to build it out.
Depending on which extensions you use, you will be required to enter business information or link to direct URLs on your website.
Once you’re done, hit save and you can publish your ads live.
Compliments! You’re halfway done!
Now it’s time to set up your Landing Page
Because you want conversions, right?

